8 Essential Watercolor Painting Tips for Beginners to Master in 2026
Watercolor painting is a dance between control and surrender, a medium where water itself becomes an artistic partner. For beginners, the journey can feel both exhilarating and intimidating. The key to unlocking its potential lies not in complex theories but in mastering a set of core principles that transform pigment and water into expressions of emotion and light.
This guide offers eight fundamental watercolor painting tips for beginners, designed to build a strong technical foundation while nurturing a unique artistic voice. Each tip is a stepping stone toward creating work that is not only visually compelling but also deeply personal, moving beyond mere representation to genuine storytelling. We will explore everything from the critical role of paper and water control to the secrets of creating atmospheric depth and the importance of a limited palette.
This curated list provides practical, actionable insights to help you navigate the medium's beautiful unpredictability. You will learn foundational techniques such as transparent layering, effective brushwork, and how to harness value and light to create mood. By understanding these concepts, you will be empowered to paint with greater confidence, intention, and soul, laying the groundwork for a rewarding and expressive artistic practice.
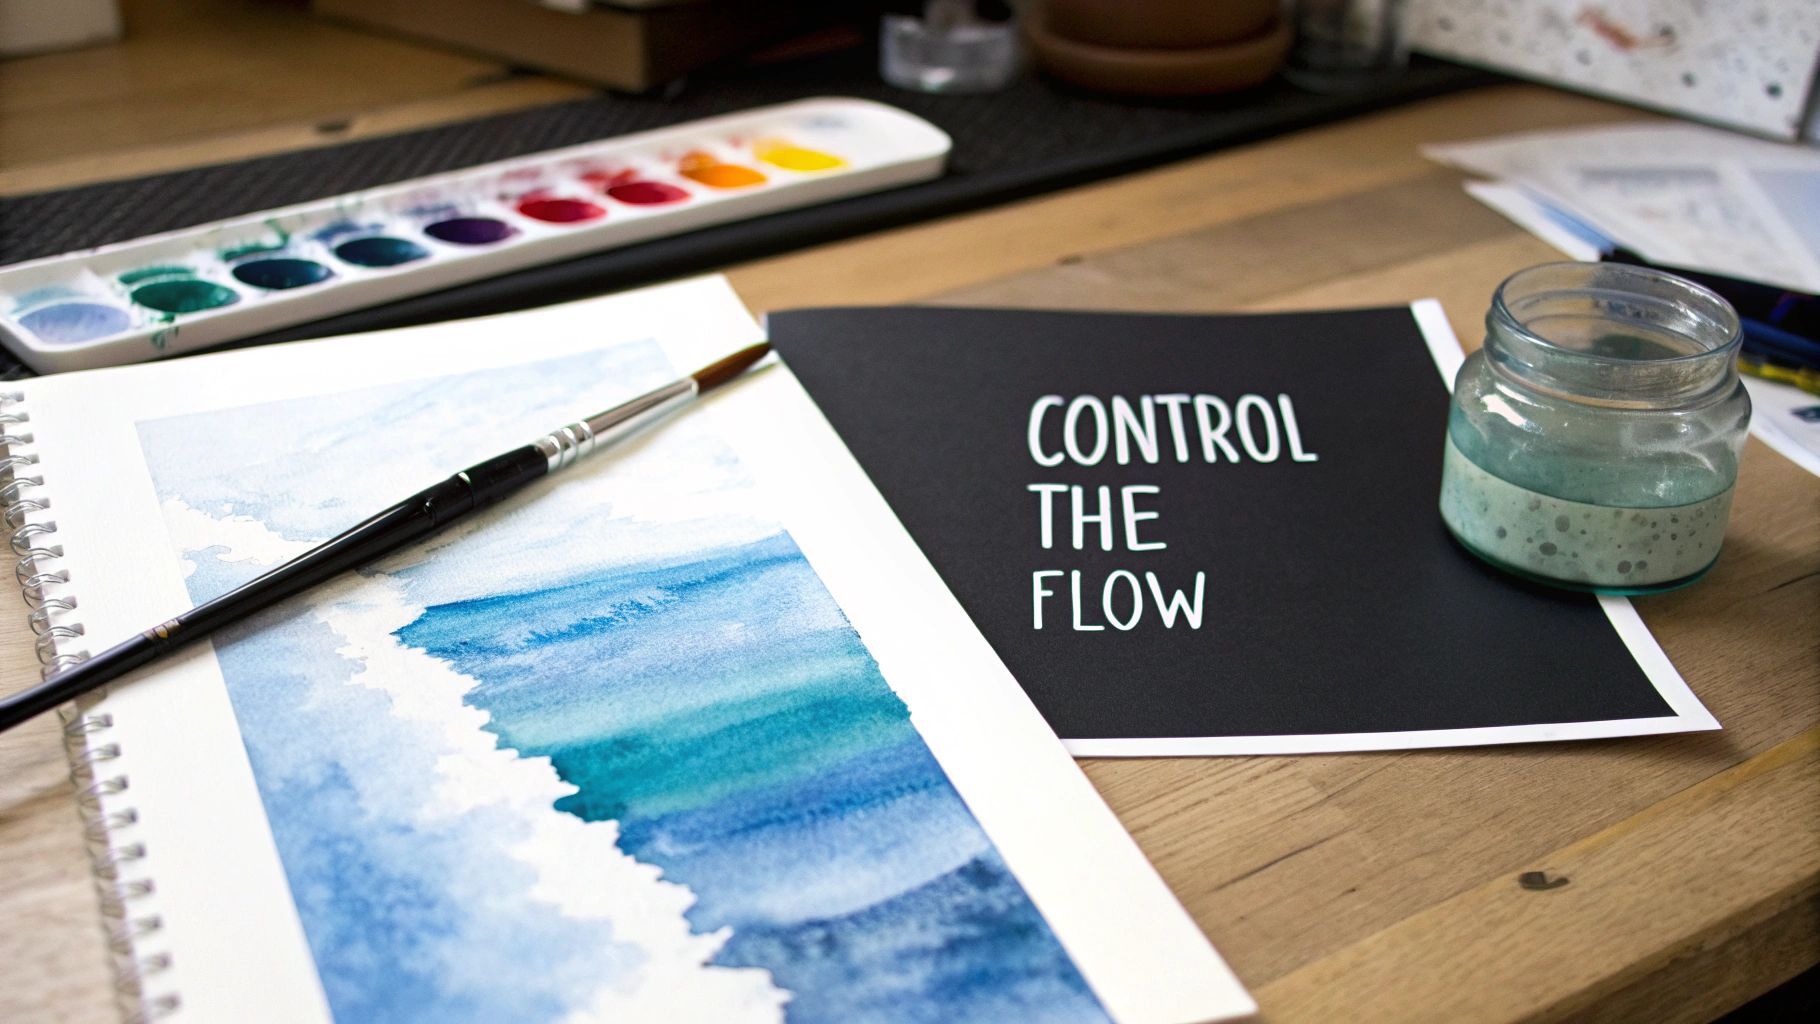
1. Master Water Control and Flow
In watercolor painting, water is not merely a solvent; it is the primary vehicle for pigment and the source of the medium's signature luminosity and transparency. Mastering water control is the most fundamental of all watercolor painting tips for beginners, as the ratio of water to pigment dictates everything from color intensity to edge quality. An imbalance can lead to undesirable outcomes: too much water causes colors to bleed uncontrollably, creating "blooms" and muddying mixtures, while too little results in a dry, streaky application that lacks the fluid grace of a true watercolor.
Understanding this delicate balance is essential for achieving soft gradations, sharp edges, and vibrant layers. Artists like Winslow Homer and J.M.W. Turner are celebrated for their masterful water control, which allowed them to capture the atmospheric essence of seascapes, from the gentlest mist to the most dramatic ocean spray. By managing water, you control the behavior of your paint and unlock the medium's expressive potential.
Actionable Techniques for Water Management
To gain proficiency, it is crucial to implement practical habits into your painting process. These strategies will help you develop an intuitive feel for how much water to use in various situations.
- Utilize a Two-Jar System: Dedicate one jar of water for rinsing pigment from your brushes and a second jar of clean water for mixing fresh colors. This prevents cross-contamination and keeps your hues vibrant.
- Test Before You Paint: Always have a scrap piece of watercolor paper nearby. Before applying a wash to your main artwork, test the pigment-to-water ratio to ensure it matches your intended value and consistency.
- Tilt for Natural Flow: Use gravity to your advantage. By slightly tilting your paper or board, you can guide the flow of a wet wash, creating natural-looking gradients ideal for skies and watery surfaces.
- Maintain Dampness with a Spray Bottle: For larger wet-on-wet passages, a light mist from a spray bottle can keep the paper receptive to paint for longer, allowing more time to blend and soften edges.
This skill is particularly vital for painting dynamic ocean scenes where the soft transition between sky and water is key. For more advanced applications, you can explore tutorials on how to paint water reflections to further refine your technique.
2. Choose Quality Paper and Understand Its Properties
The choice of paper is as critical as the paint or brushes in watercolor painting. Unlike other mediums, watercolor relies on the paper's surface to manage water, hold pigment, and reflect light through transparent layers. The quality of your paper fundamentally dictates how your paint will behave. Professional-grade papers, typically 100% cotton, offer superior absorbency and durability, allowing for techniques like lifting and scrubbing without damaging the surface. In contrast, lower-quality, wood-pulp-based papers can buckle easily, absorb pigment unevenly, and produce dull, lifeless colors.
Investing in high-quality paper is one of the most impactful watercolor painting tips for beginners, as it prevents frustration and allows the medium's true characteristics to shine. Artists who create gallery-quality work consistently use archival papers like Arches or Saunders Waterford. These surfaces are designed to withstand multiple washes and manipulations, ensuring the longevity and vibrancy of the final artwork. Understanding paper properties like weight, texture, and sizing is not just a technical detail; it is essential for achieving professional and expressive results.
Actionable Techniques for Paper Selection
To make an informed choice, beginners should familiarize themselves with the key characteristics of watercolor paper and how they influence the painting process. These guidelines will help you select the right surface for your artistic goals.
- Prioritize 100% Cotton Paper: Start with a professional-grade, 100% cotton paper. While the initial cost is higher, its superior performance will accelerate your learning and produce far more satisfying results.
- Begin with Cold-Pressed 140 lb (300 gsm): This weight and texture combination offers the most versatility. The slight texture, or "tooth," of cold-pressed paper is ideal for capturing the impressionistic qualities of ocean scenes, while the 140 lb weight provides good stability against buckling.
- Use Paper Blocks for Convenience: Purchase paper in a block format, where sheets are glued on the edges. This pre-stretches the paper, preventing it from warping when wet and eliminating a preparatory step for beginners.
- Test Before Committing: Always test your colors and techniques on a small scrap of your chosen paper. This ensures you understand how the paint will react before applying it to your final piece.
Choosing the right paper is particularly important for seascapes, where the paper's texture can enhance the visual effect of water and light. A quality cold-pressed surface will help you create dynamic, expressive works worthy of display.
3. Start with Limited Color Palettes
Beginners often assume that a wider array of colors will lead to more vibrant paintings, but the opposite is frequently true. Starting with a limited palette, typically consisting of 6 to 12 carefully chosen colors, is one of the most impactful watercolor painting tips for beginners. This intentional constraint forces a deeper understanding of color theory and mixing, preventing the muddy, overworked results that come from an overabundance of choices. It encourages artists to create harmony and unity within a piece through skillful mixing rather than relying on a multitude of tube colors.

This approach is not a modern invention; masters like Claude Monet utilized limited palettes to capture the luminous, atmospheric effects of light in his Impressionist series. By restricting his color choices, he achieved a remarkable sense of cohesion and mood. When you learn to mix a vast range of hues from a few primary colors, your work gains a sophisticated, unified quality that is difficult to achieve otherwise.
Actionable Techniques for Palette Management
Adopting a limited palette requires a strategic approach to color selection and mixing. These practices will help you build a strong foundation in color theory and create more harmonious compositions.
- Build a Split-Primary Palette: Begin with six essential colors: a warm and a cool version of each primary (red, yellow, and blue). This provides the foundation for mixing a comprehensive range of clean, vibrant secondary and tertiary colors.
- Create a Mixing Chart: Before starting a painting, create a chart to document the combinations possible with your chosen palette. This serves as a valuable reference and deepens your intuition for how specific colors will interact.
- Incorporate Earth Tones: For seascapes and landscapes, add versatile earth tones like Burnt Sienna and Yellow Ochre to your primary palette. These colors are excellent for creating natural-looking neutrals, shadows, and sandy shores.
- Mix Your Greens: Avoid relying solely on pre-mixed tube greens. Practice mixing a variety of greens using different combinations of your blues and yellows to achieve more natural and dynamic foliage and water tones.
This principle of color mixing is foundational across various mediums. To explore these concepts further, you can discover a detailed guide on how to mix paint colors that offers transferable knowledge for your watercolor practice.
4. Practice Transparent Layering and Glazing
Watercolor's defining characteristic is its transparency, a quality that allows light to pass through the pigment and reflect off the white paper beneath. This interaction creates a luminosity that is impossible to achieve with opaque mediums like oil or acrylic. Practicing transparent layering, a technique known as glazing, is one of the most vital watercolor painting tips for beginners. Glazing involves applying thin, transparent washes of color over a completely dry underlayer, which builds depth, adjusts hues, and creates complex, atmospheric effects.
This method requires a strategic approach, working from light to dark and allowing each layer to fully dry before applying the next. Artists like J.M.W. Turner masterfully used transparent layering to build sublime, atmospheric seascapes, where successive washes of color create the illusion of mist and light. By respecting the transparency of the medium, you allow lower layers to influence the appearance of upper layers, resulting in a rich visual complexity that distinguishes professional watercolor work.
Actionable Techniques for Effective Glazing
To build proficiency in layering, you must adopt a patient and methodical process. These strategies will help you create depth and emotional intensity without muddying your colors.
- Allow Each Layer to Dry Completely: Patience is paramount. Applying a new wash to a damp layer will lift the underlying pigment and create a muddy mess. Use a hairdryer on a low, cool setting to speed up drying time if necessary.
- Work from Light to Dark: Always begin with your lightest values and gradually build up to darker, more saturated colors. This preserves the luminosity of the paper and prevents colors from becoming dull.
- Use Thin, Transparent Washes: For effective glazing, your paint should have a high water-to-pigment ratio. The goal is to apply a sheer veil of color that modifies the layer beneath it without obscuring it.
- Preserve Your Whites: Plan your composition to leave the white of the paper for your brightest highlights. For intricate areas, use masking fluid to protect highlights before applying your initial washes.
- Test Glazes on Scrap Paper: Before applying a glaze to your painting, test the color combination on a scrap piece of paper to predict how the new layer will interact with the one beneath it.
This layering approach is particularly effective for developing atmospheric ocean depths and can be combined with other methods. For those interested in adding more dimension, you can learn how to create texture in paintings to complement your glazing skills.
5. Develop Brushwork Skills and Understand Brush Types
In watercolor painting, the brush is an extension of the artist's hand, directly influencing the character and emotion of every mark. Developing intentional brushwork is a critical watercolor painting tip for beginners, as different brush types, shapes, and materials create distinct textural effects and control water flow. The choice between a soft natural hair brush that holds a generous amount of water and a synthetic brush with a crisp snap can dramatically alter the outcome of a wash or a fine detail.

Understanding how to leverage these tools is fundamental to expressive painting. Artists like Winslow Homer masterfully varied their brushwork to capture the rugged textures of rocky coastlines and the fluid movement of the sea. By consciously selecting and manipulating your brushes, you can move beyond mere representation and begin to imbue your work with personality and a signature style, allowing visible strokes to add authenticity and energy.
Actionable Techniques for Brush Mastery
Building a strong foundation in brushwork requires both knowledge of your tools and dedicated practice. These strategies will help you select the right brushes and use them effectively to achieve a wide range of expressive effects.
- Build a Versatile Starter Set: Begin with a core collection of 5-7 brushes. A good set includes one or two round brushes for lines and details, two or three flat brushes of various sizes for broad washes, a mop brush for large wet areas, and a fine liner for intricate work.
- Invest in a Quality Mop Brush: For creating large, even washes, particularly for skies and water, a quality mop or squirrel brush is transformative. Its ability to hold a significant amount of water allows for smooth, continuous application without frequent reloading.
- Experiment with Dry Brush Technique: Create compelling texture by using a nearly dry brush loaded with pigment. This technique is ideal for rendering the gritty surface of rocks, the fine spray of ocean waves, or the rough texture of weathered wood.
- Practice Proper Brush Care: Preserve the life and shape of your brushes by cleaning them immediately after use with clean water. Store them upright in a jar or lying flat to dry, ensuring the bristles are not bent or compressed.
6. Master Atmospheric Perspective and Depth Creation
Creating visual depth is fundamental to transforming a flat surface into a compelling landscape or seascape. This is achieved through atmospheric perspective, the artistic principle that distant objects appear lighter, cooler, and less detailed due to the effects of the atmosphere. Mastering this is among the most impactful watercolor painting tips for beginners, as it allows you to guide the viewer’s eye through your composition, creating an illusion of expansive space. Without it, scenes can appear flat and lack the immersive quality that makes landscapes so captivating.
This technique tricks the eye into perceiving three dimensions. Elements in the foreground should be rendered with warmer colors, darker values, and sharper details. As objects recede into the middle and background, they progressively become cooler, lighter, and simpler. Artists like J.M.W. Turner used this principle to create sublime, expansive seascapes where the horizon seems to melt into the sky, conveying a profound sense of distance and scale.
Actionable Techniques for Creating Depth
Integrating atmospheric perspective requires a strategic approach to color, value, and detail. These methods will help you build convincing, layered compositions in your watercolor paintings.
- Establish a Strong Foreground: Use your warmest colors, darkest values, and most intricate details in the foreground. This anchors the viewer's gaze and creates a clear point of entry into the scene.
- Use Cooler Colors for Distance: As elements move into the background, shift your palette toward cooler hues like blues, lavenders, and grays. This mimics the natural scattering of light in the atmosphere.
- Simplify and Soften Edges: Reduce the level of detail and soften the edges of distant objects. A mountain range on the horizon should have less texture and softer contours than a rock in the foreground.
- Vary Your Values: Ensure your darkest darks are in the foreground and your lightest lights are in the distance. For seascapes, this often means the water closest to the viewer is the darkest, gradually lightening as it approaches the horizon.
This technique is especially crucial for painting ocean scenes where the vastness of the water and sky is the primary subject. By progressively lightening values toward the horizon, you can create a seamless and realistic transition that captures the immense scale of the sea.
7. Embrace Spontaneity and Learn from Mistakes
The fluid and often unpredictable nature of watercolor is not a flaw to be conquered but a characteristic to be embraced. While other mediums offer high degrees of control, watercolor rewards intuition, experimentation, and the acceptance of unexpected results. For beginners, the fear of making a mistake can be paralyzing, but within this medium, these "errors" often become gateways to creative discovery, leading to what are affectionately known as "happy accidents."
Learning to work with the water and pigment, rather than against them, is a cornerstone of developing an authentic artistic voice. The watercolor studies of masters like Winslow Homer reveal a celebrated looseness and visible spontaneity, where the artist clearly responded to the medium’s behavior in the moment. Paintings that allow for unplanned color bleeds and visible brush marks often convey a more genuine emotional resonance than those that are rigidly controlled.
Actionable Techniques for Embracing the Process
Adopting a mindset of curiosity over perfection is one of the most valuable watercolor painting tips for beginners. These practices encourage you to see every painting session as an opportunity for learning.
- Separate Practice from Performance: Dedicate specific paper or a sketchbook for experimentation. This removes the pressure of creating a finished masterpiece and gives you the freedom to explore without fear.
- Document Your Discoveries: Keep a journal to note which techniques, color combinations, or water-to-pigment ratios produced beautiful and unexpected effects. This log becomes a personal reference for future work.
- Respond, Don't Force: When a painting diverges from your original plan, resist the urge to correct it back into submission. Instead, pause and ask how you can intuitively respond to the new direction it has taken.
- Revisit "Failed" Paintings: Do not discard a piece immediately if you are unsatisfied. Set it aside for a few days; you may discover unplanned beauty or find new inspiration upon returning to it with a fresh perspective.
This approach is not just about technique; it is fundamental to artistic growth. Embracing spontaneity is a direct path to developing your own unique art style by allowing your personal instincts to guide the creative process.
8. Study Value, Light, and Shadow Fundamentals
While beginners often focus on color, it is value, the relative lightness or darkness of a hue, that truly creates dimension, drama, and emotional impact in a painting. Understanding the fundamentals of light and shadow is one of the most critical watercolor painting tips for beginners because it is the key to rendering believable three-dimensional forms. Mastering value relationships allows an artist to guide the viewer's eye, establish a focal point, and generate a powerful atmosphere.
Poor value relationships can make even the most beautiful colors appear flat and unconvincing, whereas masterful value work can elevate a simple palette into a sophisticated composition. Artists like Rembrandt and Winslow Homer utilized dramatic value contrast to create emotional intensity and guide the narrative of their work. By prioritizing value over color, you build the structural integrity that makes a painting compelling.
Actionable Techniques for Mastering Value
To develop a strong command of light and shadow, you must integrate value-focused exercises into your practice. These techniques will help you see the world in terms of light and dark, a foundational skill for creating impactful art.
- Create Monochromatic Value Studies: Before starting a full-color painting, create small grayscale sketches of your subject. This practice forces you to solve compositional and lighting problems without the distraction of color.
- Squint to See Values: Frequently squint your eyes when looking at both your subject and your painting. This simple trick blurs details and mutes colors, making it easier to see the true value relationships and identify areas of high contrast.
- Establish a Clear Light Source: Before you make your first mark, decide on the direction and quality of your light source. This decision will dictate where your highlights, mid-tones, and shadows fall, ensuring a cohesive and believable scene.
- Reserve Your Darks and Lights: The strongest contrast between your lightest lights and darkest darks will naturally create a focal point. Use these extremes strategically to draw the viewer’s attention to the most important part of your painting.
This deliberate approach to light is essential for capturing the dynamic interplay of sun and shadow in a seascape or the soft, graded light of a misty morning. To see how master artists manipulated light for emotional effect, you can explore various impressionistic painting techniques that rely heavily on value and light.
8-Point Beginner Watercolor Tips Comparison
| Technique | 🔄 Implementation Complexity | ⚡ Resource Requirements | ⭐ Expected Outcomes | 📊 Ideal Use Cases | 💡 Quick Tips |
|---|---|---|---|---|---|
| Master Water Control and Flow | High — requires intuition and practice; unpredictable | Low–Medium — brushes, water jars, suitable paper, controlled workspace | Luminous, transparent washes; natural blending and atmospheric effects | Seascapes, soft gradients, expressive wet-on-wet passages | Test ratios on scrap; keep multiple water jars; tilt paper to guide flow; work quickly wet-on-wet |
| Choose Quality Paper and Understand Its Properties | Medium — selection/testing and optional stretching | High — 100% cotton papers (140–300+ lb), blocks or sheets, archival sizing | Brighter color, better lifting/corrections, archival longevity | Gallery-quality work, heavy wet techniques, finished originals | Start with 140 lb cold-pressed; use blocks to avoid stretching; save expensive sheets for finals |
| Start with Limited Color Palettes | Low — simplifies decisions but needs color theory | Low — small set of pigments and mixing chart | Cohesive harmonies; improved color-mixing skills and clearer compositions | Beginners, impressionistic seascapes, series work for consistent mood | Use warm/cool primaries (6 colors); keep a mixing chart; limit 3–4 dominant colors per piece |
| Practice Transparent Layering and Glazing | Medium — requires planning and drying time | Medium — quality paper, thin washes, masking fluid/hairdryer optional | Deep luminosity, subtle color modulation, atmospheric depth | Refined atmospheric seascapes and layered compositions | Work light-to-dark; let layers dry fully; use masking for highlights; test glazes first |
| Develop Brushwork Skills and Understand Brush Types | Medium — learning shapes, sizes, and maintenance | Medium — 5–7 versatile brushes (natural + synthetic mix), cleaning supplies | Varied marks, improved control, and signature expressive strokes | Textured seascapes, detail work, expressive mark-making | Start with a core set (rounds, flats, mop, liner); clean immediately; store bristles upright |
| Master Atmospheric Perspective and Depth Creation | Low–Medium — conceptual with practice on value/color temp | Low — relies on color/value control rather than special tools | Convincing spatial depth; immersive landscapes/seascapes | Expansive horizons, layered seascapes, compositions needing depth | Use cooler, lighter colors for distance; soften distant edges; reduce detail progressively |
| Embrace Spontaneity and Learn from Mistakes | Low — mindset shift; more effective with basic skills | Low — practice sheets, camera for stages, sketchbook/journal | More authentic, dynamic results; discovery of unique "happy accidents" | Experimental studies, practice sessions, developing personal voice | Keep practice separate from finals; photograph stages; journal discoveries and accidents |
| Study Value, Light, and Shadow Fundamentals | High — demands disciplined observation and planning | Low–Medium — time for value studies, grayscale sketches | Strong contrast, believable form, heightened emotional impact | Focal compositions, dramatic seascapes, gallery-ready pieces | Make value thumbnails; squint often to read values; reserve whites and plan light source |
From Technique to Personal Expression
The journey into watercolor painting begins with understanding its fundamental elements, yet it culminates in a deeply personal form of artistic expression. The watercolor painting tips for beginners detailed throughout this guide are not merely a series of isolated rules; they are interconnected principles that form a comprehensive foundation. From mastering the delicate balance of water control and flow to selecting quality paper that supports your vision, each step builds upon the last.
Embracing a limited color palette encourages a sophisticated understanding of color theory, while practicing transparent layering and glazing unlocks the medium's signature luminosity. Developing versatile brushwork and mastering atmospheric perspective are the technical skills that transform a flat surface into a world with depth and emotion. By studying the fundamentals of value, light, and shadow, you learn to sculpt form and create a compelling visual narrative. Ultimately, the ability to embrace spontaneity and learn from mistakes is what transitions a painter from a student of technique to a confident artist.
Bridging Skill with Intuition
The true power of these watercolor painting tips for beginners is realized when they become second nature, freeing you to focus on your unique artistic voice. As you internalize these concepts, you will find your process becomes more intuitive. You will begin to anticipate how pigments will mingle on wet paper, how a glaze will shift the underlying color, and how a single brushstroke can convey movement or stillness.
The objective is not just to replicate a scene but to interpret it. Your technical proficiency serves your creative intuition, allowing you to translate an internal feeling or a fleeting moment into a tangible, visual experience.
This transition is where art transcends craft. The most captivating works arise from this very intersection, where practiced skill supports uninhibited expression. Your growing confidence will empower you to take creative risks, push boundaries, and allow the unpredictable nature of watercolor to contribute its own magic to your work.
Your Path Forward in Watercolor
To continue your growth, dedicate consistent time to practice. Revisit the exercises and prompts mentioned earlier, applying different techniques to the same subject to see how the outcomes vary. Create small value studies before starting a larger piece, or challenge yourself to paint a scene using only three primary colors. Each practice session reinforces your skills and builds muscle memory.
Most importantly, approach your work with patience and curiosity. Every painting, whether it meets your expectations or not, is a valuable lesson. It provides critical feedback on what to refine, what to explore further, and how to better achieve your artistic goals. Let this process be one of discovery, not of a search for perfection. Your brushstrokes will eventually tell your story, and the luminous, fluid nature of watercolor will reveal the profound beauty in both the planned and the wonderfully unexpected.
Ready to see where these foundational skills can lead? Explore the emotive, impressionistic seascapes and powerful narratives at Skyler’s Art to witness how a mastery of watercolor fundamentals can blossom into a unique and compelling artistic voice. Discover your inspiration at Skyler’s Art.