How to Start Painting with Acrylics: A Beginner’s Guide
So, you’re ready to dive into the world of acrylics. That's fantastic. The best way to start is by gathering a few essential tools, clearing a small space, and giving yourself the freedom to just play with color. Honestly, all you truly need to begin are some paints, a couple of brushes, and a canvas. That's it.
Your First Steps Into Acrylic Painting

Starting any new creative practice can feel a little intimidating, but I can tell you from experience that acrylic painting is one of the most welcoming and rewarding ways to get into art. Its forgiving nature makes it the perfect medium for beginners. Unlike oils, acrylics dry quickly, clean up easily with soap and water, and are much friendlier on your wallet. These qualities remove many of the hurdles that can discourage new artists.
And you're not alone in your interest. The acrylic paints market was projected to grow to over US$ 230 million by 2027, expanding at a 6.1% CAGR. This boom is happening for a reason—over 70% of contemporary hobbyists now choose acrylics because they're so convenient and produce such vibrant results. You can read more about this trend in this detailed acrylic paints market report.
Overcoming Blank Canvas Fear
Every artist, new or experienced, has faced the dreaded blank canvas. The trick is to shift your perspective. Don't think of your first painting session as a performance or a test. Instead, see it as a simple, low-pressure experiment.
Your only goal is to learn how the paint feels on the brush, how the colors look when they mix, and what kinds of marks you can make. Give yourself permission to be messy and create something you might just paint over tomorrow.
My best advice is to make your very first mark on the canvas within five minutes of setting up. Don't overthink it. A simple swipe of color is enough to break the spell of the blank canvas and get your creative momentum flowing.
The Absolute Essentials Checklist
You don’t need to buy out the entire art store to get started. In fact, it's better if you don't. Focus on a few quality items that will help you learn the fundamental acrylic painting techniques without overwhelming you.
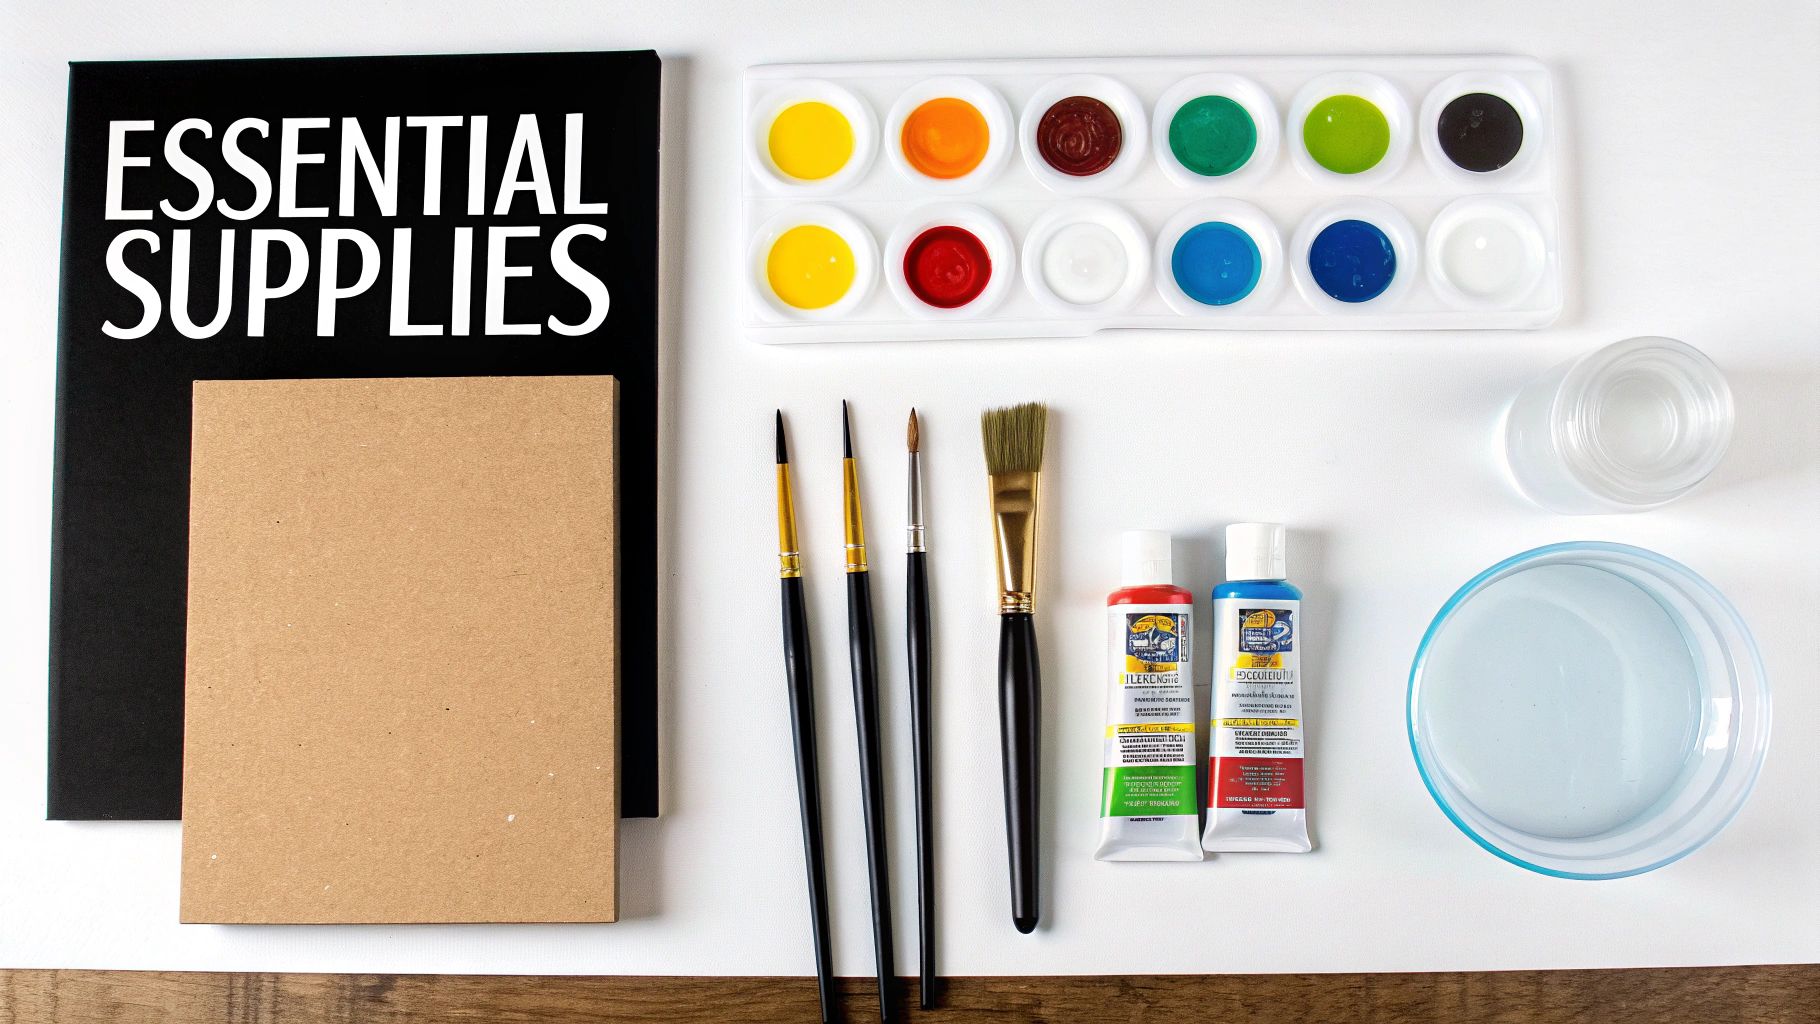
Here is a quick look at the non-negotiable items I recommend for your very first painting session. Think of this as your core toolkit.
Essential Acrylic Painting Starter Kit
| Item | Recommended Type | Why It's Essential |
|---|---|---|
| Acrylic Paints | Student-grade starter set (primary colors + black & white) | Provides all you need for color mixing without a huge investment. |
| Brushes | Small variety pack (flat, round, filbert) | A few different shapes will let you experiment with different strokes. |
| Painting Surface | 8×10" or 9×12" canvas panels | Inexpensive, sturdy, and perfect for practice exercises. |
| Palette | Disposable palette paper or a ceramic plate | A dedicated surface for mixing colors cleanly. |
| Water & Rags | Two water jars and paper towels or old rags | Essential for rinsing brushes and thinning paint. |
With these few items, you have everything you need to create your first painting. Let's break down what to look for in each.
- A Basic Set of Acrylic Paints: Look for a starter kit with primary colors—red, yellow, and blue—plus black and white. This will be more than enough to mix a huge range of colors.
- A Few Versatile Brushes: A small variety pack is your best bet. A flat brush is great for broad strokes, a round one works for details, and a filbert is a wonderful all-rounder.
- A Painting Surface: I always recommend canvas panels for beginners. They're affordable, take paint well, and are easy to store.
- A Palette: Don't get fancy here. A simple paper plate or a piece of parchment paper taped to your table works perfectly for mixing paints.
- Water Jars and Paper Towels: You'll want two jars—one for rinsing brushes and another for clean water to mix with your paints. Paper towels or old rags are a must for blotting excess water and paint.
Choosing Your Essential Painting Supplies
Walking into an art supply store for the first time can be intimidating. The sheer number of paints, brushes, and canvases is enough to make anyone’s head spin. But you don't need a mountain of gear to get started. Let's cut through the noise and focus on a handful of essentials that will get you painting without breaking the bank.
A common misconception is that you need the most expensive materials right away. Honestly, student-grade paints are a fantastic and practical choice when you're just learning the ropes. They have a slightly lower pigment load than their professional counterparts but are perfect for practicing color mixing, layering, and getting a feel for the medium. You can always upgrade later as your skills develop.
Selecting Your First Paints and Brushes
Start your paint collection with the fundamentals: the primary colors (a good red, yellow, and blue), plus black and white. With just these five tubes, you can mix an incredible spectrum of colors. I recommend looking for heavy body acrylics for their thick, buttery texture; they're so popular they're found in 60% of starter kits sold in North America. These paints hold their shape and show off brushstrokes beautifully, much like the techniques you see in Skyler’s emotive landscapes.
When it comes to brushes, a small set of synthetic bristles will be your workhorse. They are durable, versatile, and stand up well to water and acrylic paint. Natural hair brushes, while lovely for other mediums, can be damaged by water over time. In fact, 80% of professionals advise against natural hair for water-based paints for this very reason.
A great starter kit only needs three key shapes:
- A Flat Brush: Your go-to for covering large areas and creating broad, even strokes.
- A Round Brush: Perfect for lines, details, and delicate work.
- A Filbert Brush: A fantastic all-rounder that's part flat, part round, giving you the best of both worlds.
A few of these brushes in various sizes, from a small #2 to a larger #12, will handle almost anything you want to paint initially.
My best advice? Resist the urge to buy every brush and color you see. Start with a curated, high-quality selection. You’ll learn far more by mastering a few essential tools than you will from a massive collection that just gathers dust.
Choosing Your Painting Surface and Palette
Canvas is the classic surface for acrylics, and you have a couple of great options as a beginner. Canvas panels are stiff boards wrapped in canvas, making them affordable, portable, and easy to store. Stretched canvas, which is fabric pulled over a wooden frame, offers a more traditional feel with a bit of "bounce" as you paint.
Whichever you choose, it's a good idea to make sure it's primed with gesso. Gesso is a primer that gives the canvas a bit of "tooth" for the paint to grab onto. Most canvases you buy will come pre-primed, but I often add an extra coat or two myself for a smoother, more archival surface. Just be sure to let each coat dry for at least an hour.
Finally, you'll need a palette. You don't need a fancy wooden one. A simple ceramic plate from your kitchen works perfectly, or you can buy a pad of disposable palette paper for easy cleanup. For more tips on getting your space and materials ready, take a look at our complete acrylic painting guide.
Creating Your Ideal Workspace
You don’t need a dedicated studio to get started with acrylics. In fact, most of us begin in a quiet corner of a room, and that's perfectly fine. The real goal is to carve out a functional and inspiring area where you feel comfortable and motivated to create. It’s about accessibility and efficiency, not square footage.
Before you even think about squeezing out that first tube of paint, protect your space. Once acrylic paint dries, it's a permanent polymer, which means it’s a real headache to remove from carpets, wood floors, or furniture. Lay down an old sheet, a plastic drop cloth, or even some flattened cardboard boxes to cover the floor and tabletop. A cheap vinyl tablecloth works wonders, too.
Lighting and Ventilation
Good lighting is absolutely crucial. If you can’t see your colors accurately, you can’t mix them accurately. Natural daylight from a window is the gold standard, but it’s not always consistent or available. The best solution is to supplement with a neutral, bright artificial light. A flexible desk lamp with a daylight-imitating LED bulb will ensure your reds look like reds, not oranges, no matter the time of day.
Ventilation is another key safety consideration. While acrylics are water-based and have a much lower odor than oils, some paints and mediums can still release mild fumes.
- Open a window: The easiest approach is to simply crack a nearby window to get some fresh air circulating.
- Use a fan: If a window isn't practical, a small fan can help keep the air moving in your space.
An organized space fosters a clear mind. When your supplies are within easy reach and your area is prepped, you remove the barriers to creativity. It becomes that much easier to just sit down and paint.
Organizing for an Efficient Workflow
Think about how you’ll arrange your supplies to make your painting sessions smoother. Do you prefer to stand or sit? An easel is fantastic because it lets you stand back from your work, which is invaluable for judging your composition from a distance. That said, painting on a flat table is completely fine and is often easier for smaller pieces or when using more fluid, watercolor-like techniques.
A simple trick for a better workflow is to place your most-used items—your palette, water jars, paints, and paper towels—on your dominant side. This small bit of organization minimizes clumsy interruptions and helps you stay lost in the creative process. A comfortable, well-organized space really does make all the difference.
Getting to Grips with Fundamental Acrylic Techniques
You've got your supplies, and your creative space is ready to go. Now for the fun part: actually putting paint on canvas. This is where the abstract ideas we've talked about become real, tangible skills. Learning to paint with acrylics is far less about memorizing jargon and much more about developing a genuine feel for how the paint behaves on your brush and interacts with your surface.
Don't aim for a masterpiece on your first go. The real goal here is to build your confidence with small, successful experiments. Think of every single brushstroke as a learning opportunity—a chance to understand what the paint wants to do. Mastering these foundational techniques is what will give you the control to bring your creative vision to life.
Mastering Brushwork and Layering
Think of your brush as an extension of your hand. Learning its language is the very first step toward creating expressive, intentional art. Different brushes are designed to make very different marks. For example, a flat brush is perfect for laying down broad, even areas of color or creating sharp, clean edges. A round brush, on the other hand, gives you beautiful lines and is ideal for more delicate details.
Get a feel for this on a piece of scrap paper or a practice canvas. Try a few exercises:
- Make long, smooth strokes using a flat brush.
- Try creating short, choppy dabs with a stiff bristle brush—a technique called scumbling.
- Practice making fine, controlled lines with just the very tip of a round brush.
- See how you can create lines of varying thickness just by applying more or less pressure with that same round brush.
Layering is a cornerstone of acrylic painting. Because acrylics dry so quickly, you can build up colors and textures—and just as importantly, you can easily paint over any mistakes. Many professional artists work from dark to light. This means they establish the shadow areas of a painting first, then add the mid-tones, and finally apply the brightest highlights on top. It’s a fantastic method for giving your work a real sense of depth and dimension.
Here's a crucial tip that trips up a lot of beginners: acrylics almost always dry a little bit darker than they appear when they're wet. This happens because the white binder mixed into the paint becomes clear as the water evaporates. To compensate, get into the habit of mixing your colors just a touch lighter than you actually want the final result to be.
Exploring Blending Techniques
Blending is how you create those soft, seamless transitions between colors. It’s an essential skill for painting anything with a smooth gradient, like a sunset sky or the gentle curve of an apple. The fast-drying nature of acrylics can make this feel tricky at first, but a couple of key methods will give you all the control you need.
Below is a quick comparison of the most common techniques you'll use.
Common Acrylic Painting Techniques Explained
| Technique | How to Do It | Best For Creating |
|---|---|---|
| Wet-on-Wet | Apply a new color of wet paint directly next to or into another area of wet paint on the canvas. Use your brush to gently feather the two colors together at their meeting point. | Soft, fluid transitions and blended backgrounds. You have to work quickly before the paint starts to dry. |
| Wet-on-Dry | Wait for your first layer of color to dry completely. Then, apply a very thin, slightly transparent layer of the second color over the edge of the first. | Glazed, subtle transitions and a more controlled, layered effect. This method is much more forgiving for beginners. |
Wet-on-Wet Blending requires you to work fairly quickly. You're applying a new, wet color right next to another wet color and then using your brush to mix them together right there on the canvas.
Wet-on-Dry Blending is a more patient approach. You let the first color dry completely before adding a thin layer of the next color over the edge. This creates a softer, glazed look. If you want to dive deeper into creating these kinds of nuanced effects, you can explore various impressionistic painting techniques that build on these very fundamentals.
A Practical Approach to Color Mixing
You absolutely do not need dozens of different paint tubes to create a rich, beautiful palette. By understanding just a little bit of color theory, you can mix almost any color you can imagine from a few primary hues (red, yellow, and blue), plus black and white.
A great first exercise is to create your own simple color wheel. See for yourself how the primary colors combine to make secondary colors: orange, green, and purple.
From there, you can add white to any color to lighten it (this is called a tint) or add black to darken it (creating a shade). A word of caution with black paint: a tiny amount goes a very long way, and using too much can make your colors look dull and muddy. Often, you can create a much more natural-looking shadow by mixing a color with a small amount of its complement (the color directly opposite it on the color wheel).
The art materials market has seen incredible growth, expanding from USD 9.97 billion in 2025 to a projected $14.86 billion by 2032, showing just how many people are picking up a brush. Even niche tools like acrylic paint markers, which are great for outlining your work, are expected to become a $264.58 million market. It's clear that art is becoming more accessible than ever.
The flowchart below breaks down the simple but essential process of setting up your workspace for these exercises.
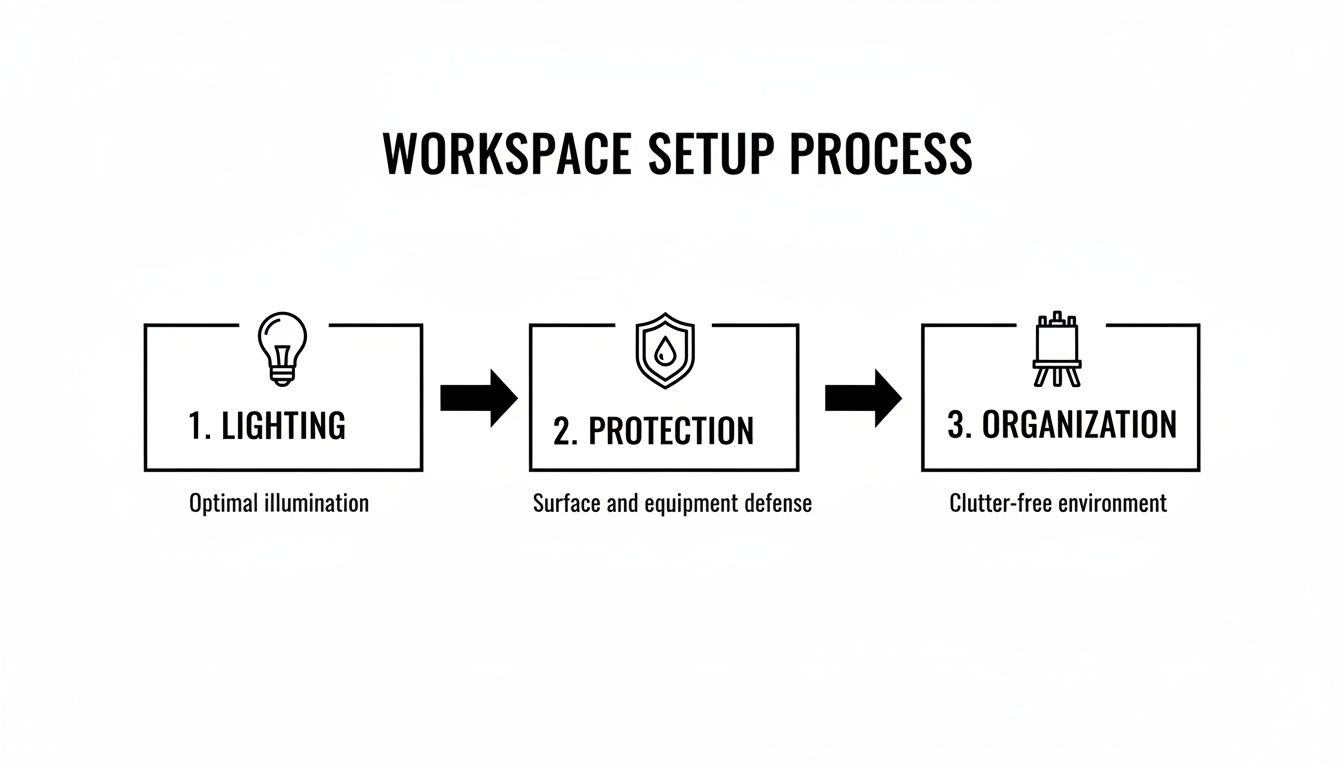
This just goes to show that a great painting session always starts with a solid foundation: good lighting to see your colors truly, protection for your surfaces, and an organized station so your tools are always within reach.
Your First Painting Projects
Alright, it's time to put all that theory into practice and get some paint on a canvas. The following exercises are designed to be fun, low-pressure ways to build your confidence as you get started. Think of them as guided experiments, not tests. The goal isn't to create a perfect masterpiece on your first try. It’s about getting a real feel for how the paint moves, layers, and blends.
These first few paintings are your personal playground. This is where you'll take what you've read and make it real, turning abstract concepts into actual, hands-on skill. Embrace the process and don't stress about the final product. Every single brushstroke is a step forward.
Project 1: The Foundational Color Wheel
Before diving into a full-blown scene, the first thing I recommend to any new painter is to create a simple color wheel. This exercise is absolutely foundational. It’s a direct, hands-on way to understand how colors relate to each other and gives you crucial mixing experience. You’ll quickly develop an instinct for how much blue to add to yellow for a rich green, or how red and blue combine to make a vibrant violet.
- Start with the primaries: On your canvas or paper, place a small dab of red, yellow, and blue, spacing them out like the points of a triangle.
- Mix your secondaries: In the gaps between each primary, mix the two adjacent colors. Red and yellow make orange, yellow and blue make green, and blue and red make violet.
- Take a moment to observe: Pay attention to how different proportions of paint change the final hue. This simple activity is one of the most powerful ways to internalize color theory.
Getting comfortable with this is essential. Once you have a feel for mixing your basic colors, you'll have the confidence to create just about any shade you can imagine.
Every artist I know started by learning to mix colors. This exercise isn't just a technical step; it's a rite of passage. It connects you to a fundamental artistic tradition and unlocks the true potential of your palette.
Project 2: A Simple Still Life Apple
Now, let's take that color knowledge and apply it to a three-dimensional object. A single apple is the perfect subject for a first still life. It has a basic, recognizable shape, but also subtle shifts in color and clear highlights and shadows. This makes it an excellent study in form and light.
Find an apple and set it on a table under a single light source, like a desk lamp. Really look at it for a minute. Notice where the light hits it most directly—that's your highlight. Find the darkest part of the apple, away from the light; this is its core shadow.
The challenge here is to capture that play of light and shadow using the colors you now know how to mix. I find it’s easiest to work from dark to light. Establish the general shape and the shadows first, then gradually build up the mid-tones and add the brightest highlights last. This method is a fantastic way to give your subject a real sense of weight and volume. These are skills you'll use in everything, including more complex pieces like when you start painting seascapes with acrylics.
Don't aim for a perfect, photographic copy. The real goal is to capture the essence of the apple's form. This simple project will teach you more about observing light and shadow than any book ever could.
Looking After Your Art and Tools
If you want to save yourself a lot of future frustration (and money), it’s worth building some good habits right from the start. Taking proper care of your brushes, paints, and finished pieces is one of those non-negotiable skills that really separates a casual painter from a serious artist. Think of it as part of the creative process itself.
The most critical habit? Cleaning your brushes the moment you’re done with them. Acrylic paint is essentially a plastic polymer, and once it dries, it's permanent. A brush with hardened acrylic deep in its bristles is, unfortunately, often a lost cause.
Keeping Your Brushes and Paints in Good Shape
Cleaning your brushes doesn't have to be a chore. First, get as much paint off as you can with a paper towel. Next, work a bit of mild soap into the bristles in your palm with some lukewarm water. Keep rinsing and gently massaging until the water runs completely clear.
Once they're clean, gently squeeze out the excess water, reshape the brush head with your fingers, and lay it flat to dry. You can also hang brushes with the bristles pointing down, which is even better. This stops water from seeping into the metal ferrule and loosening the glue that holds everything together.
As for your paints, always make sure the caps are screwed on tight. Acrylics dry out fast when exposed to air. For paints you don't use often, you can place a tiny piece of plastic wrap over the opening before twisting the cap on for an extra-secure seal.
Taking care of your artwork after the final brushstroke is just as important as the act of painting. A coat of varnish is the professional standard for protecting an acrylic painting and making sure it lasts.
The Finishing Touch: Varnishing Your Painting
Varnishing is the final step that will protect your hard work from dust, dirt, and UV light, which can cause your beautiful colors to fade over time. It’s a simple process that makes a huge difference.
Varnishes typically come in three main finishes, so you can choose the look you prefer:
- Gloss Varnish: Gives you a shiny, reflective surface that really makes colors pop and feel deeper.
- Matte Varnish: Creates a flat, non-reflective finish that’s very modern and subtle.
- Satin Varnish: My personal favorite—it’s the perfect middle ground with a soft, gentle sheen.
A couple of thin, even coats applied with a wide, clean brush is all it takes to seal your masterpiece. This final touch will keep its colors vibrant and protected for years to come.
Your First Questions, Answered
As you get started with acrylics, you’re bound to have a few questions. It’s completely normal. Every artist, myself included, has stood in front of a canvas wondering about the same things. Let's tackle some of the most common hurdles right now so you can paint with more confidence.
What If I Make a Mistake?
This is probably the #1 question I hear from new painters, and the answer is one of the best things about acrylics. Messed up a brushstroke? Color not quite right? Don’t panic.
The beauty of this medium is its opacity and fast drying time. You don't need to scrape anything off or start over. Just let the mistake dry for a few minutes, and then you can paint right over it as if it never happened. It's incredibly forgiving, which makes it perfect for fearless experimentation.
How Much Water Should I Add to My Paint?
The consistency of your paint is entirely up to you and the effect you're after. Think of water as a tool to change the paint's personality.
-
For thick, textured strokes that show your brushwork, use the paint straight from the tube. It will be rich and buttery.
-
To make the paint flow more smoothly off the brush, dip your brush in a little water and mix it into the paint on your palette. Add just a few drops at a time until it feels right.
-
For a transparent, watercolor effect, you can add more water. However, a better option is to use an acrylic medium (like a "flow improver" or "glazing medium"). Using too much water can break down the paint's binder, causing it to lose its ability to stick to the canvas properly once dry. A medium preserves the paint's integrity while giving you that transparent look.
Can I Mix Different Brands of Acrylics?
Absolutely. Feel free to mix different brands of student-grade or professional-grade acrylic paints together. Their chemistry is almost always compatible, so you won't run into any issues.
The one rule to remember is to never mix acrylics with other types of paint, like oils. Their fundamental composition is completely different (water-based vs. oil-based), and they will simply not mix. For a deeper dive into getting your colors just right, be sure to check out our detailed guide on color mixing.