
How to Rent Space for Woodworking The Ultimate Guide
Finding the perfect spot to set up your woodworking practice is a critical first step, whether you're a weekend hobbyist or a seasoned professional. The right space isn't just about four walls and a roof; it's about finding an environment that supports your craft, fits your budget, and matches the scale of your projects.
Finding the Right Workshop for Your Craft
Before you even think about your next project, you have to nail down your workspace. This is the foundation for everything you'll create. The journey to rent a space for woodworking usually leads down one of three main roads, each with its own unique landscape of benefits and challenges.
A woodworker crafting small, personal items on weekends will have very different needs than a professional building custom furniture on commission. One might thrive in a collaborative, shared environment, while the other requires the privacy and control of their own dedicated shop. Knowing where you stand is key to making the right choice.
The Three Main Paths to a Woodworking Space
As you start looking, you'll find that rental options generally fall into three categories. Each one is built for a different type of woodworker, from the casual enthusiast to the full-time business owner.
Community Makerspaces: Think of these as creative community centers. They offer a mix of tools for all sorts of crafts, not just woodworking—you might find 3D printers and laser cutters alongside a table saw. They're a fantastic starting point for beginners who want access to a wide array of equipment without the hefty price tag and who enjoy a social, collaborative atmosphere.
Dedicated Shared Woodshops: These are a step up in focus. Unlike a general makerspace, everything here is geared specifically toward woodworking. You’ll typically find higher-end, specialized machinery and a community of serious, like-minded craftspeople. It’s the ideal middle ground for dedicated hobbyists and emerging professionals looking to refine their skills.
Private Commercial Units: For the established professional or a growing woodworking business, nothing beats the autonomy of a private unit. You have total control over the layout, the security of your projects, and 24/7 access. Of course, this freedom comes with greater responsibility and cost, as you'll be on the hook for rent, utilities, and insurance. The process can be similar to what's outlined in our guide on finding art collectives near you, which also focuses on securing dedicated creative spaces.
This decision tree can help you visualize which option aligns best with your goals, whether you're working for passion, profit, or a bit of both.
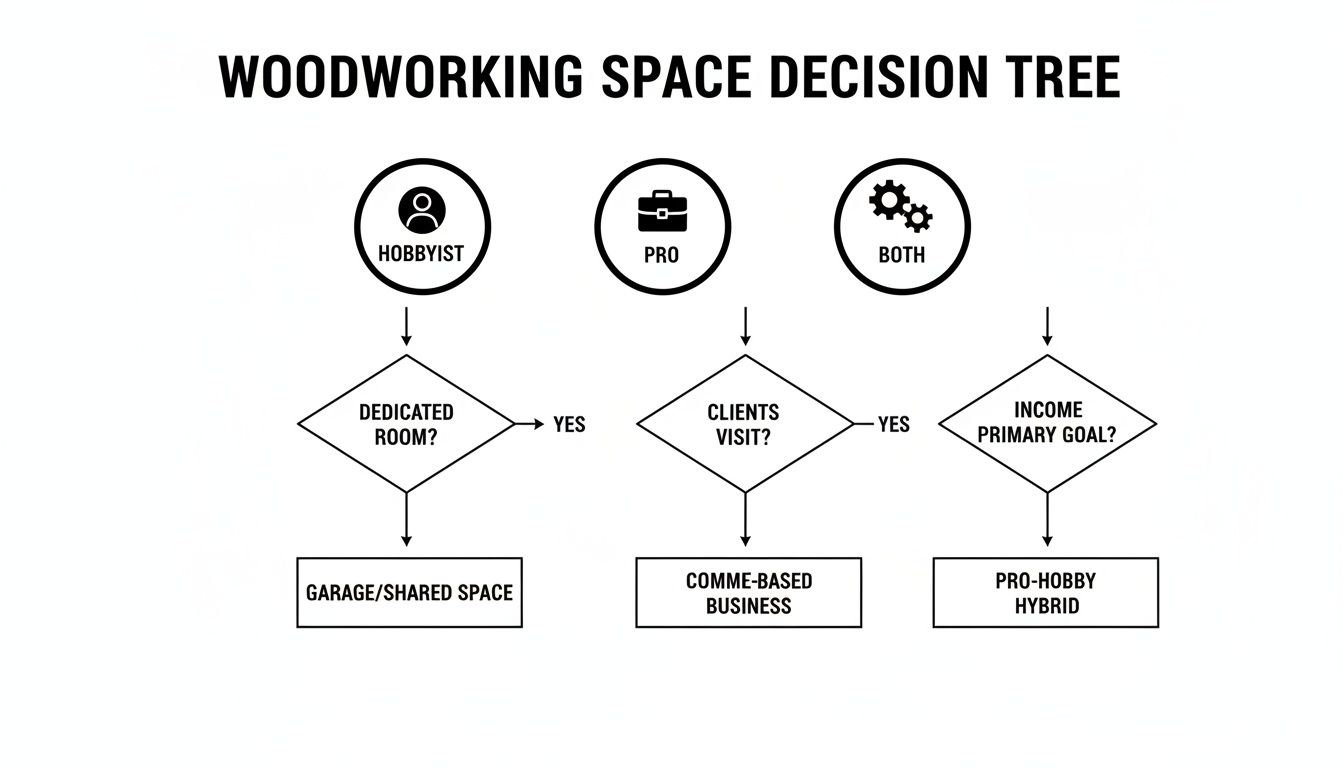
As the flowchart shows, your primary motivation—be it a personal hobby or a professional enterprise—is the clearest indicator of the right rental environment for you.
To help you weigh the pros and cons at a glance, here’s a quick breakdown of how these three options stack up against each other.
Comparison of Woodworking Space Options
| Feature | Shared Makerspace | Dedicated Woodshop | Private Commercial Unit |
|---|---|---|---|
| Cost | Low (monthly membership) | Moderate (higher membership/fees) | High (monthly rent + utilities) |
| Equipment | Broad range, often basic | Specialized, high-quality woodworking tools | Bring Your Own (BYO) |
| Access | Limited (scheduled hours) | More flexible, often 24/7 for members | Full 24/7 control |
| Community | High (diverse creatives) | High (fellow woodworkers) | Low (private, isolated) |
| Space | Shared, often crowded | Shared but more organized | Private, customizable |
| Best For | Beginners, hobbyists, multi-craft makers | Serious hobbyists, emerging pros | Established professionals, businesses |
This table should make it easier to see where your needs align. A makerspace is great for starting out, but a private unit is essential once you need to control your own workflow and protect your designs.
How to Locate Available Spaces
Finding these workshops isn’t always as simple as a Google search. The best spots are often found through word-of-mouth and community connections, so you’ll need to do a little digging.
Start by reaching out to local woodworking guilds or clubs. Their members are an incredible resource and often have the inside scoop on private shops or shared spaces that aren't advertised publicly. I've also had great luck with online communities—Facebook groups for local woodworkers or maker forums can be goldmines for leads and honest reviews.
And don't forget the old-school approach. Stop by your local lumberyards and specialty tool suppliers. They're often the unofficial hubs of the local woodworking scene and might have a bulletin board with listings or staff who know someone with space to spare.
This search for workshop space is happening within a booming industry. The demand for quality woodworking machinery is set to climb significantly, which tells us that more and more people—both hobbyists and pros—are getting serious about the craft and need a place to work.
Market forecasts back this up, with some projections showing the global woodworking machinery market could hit USD 9.03 billion by 2034. This growth is good news for anyone looking to rent space for woodworking, as it means more options are likely to become available, especially in cities with strong creative and industrial sectors.
Creating Your Workshop Budget and Understanding Costs
Finding the right workshop is a huge step, but it's also a serious financial move that demands a clear-eyed plan. If you're going to rent a space for your woodworking, you have to look past the advertised monthly rent. The real cost lies in the details—the upfront cash you'll need and the recurring expenses that can sneak up on you.
Right off the bat, you'll face some hefty initial payments. Most landlords require a security deposit, which is usually one or two months' rent, plus the first month's payment upfront. So, for a private commercial spot listed at $1,200 a month, you could easily need $3,600 in cash just to get the keys. That's a significant hurdle you need to be ready for.

Uncovering the Hidden Monthly Expenses
Once you're in, the base rent is just the beginning. Several other costs will hit your bank account every month, and this is where many woodworkers get into trouble. Getting these numbers right is the key to making your workshop sustainable.
Utilities: Your power bill won't look like the one at home. Power-hungry machines like a 5HP cabinet saw, a big dust collector, or a wide belt sander will make your meter spin. Always ask the landlord if you can see previous utility statements for the unit to get a real-world estimate.
Insurance: Don't even think about skipping this. General liability insurance is a non-negotiable for most landlords. It protects you if someone gets hurt in your shop or if your work accidentally damages the building. You'll have a monthly premium for this, so factor it in.
Common Area Maintenance (CAM) Fees: If you're in a commercial building with other tenants, you’ll likely pay CAM fees. These cover the costs of maintaining shared spaces like hallways, parking lots, and restrooms. They're usually charged per square foot and tacked onto your rent.
These aren't optional add-ons; they're fundamental costs of having a dedicated workspace. If you ignore them, your dream shop can quickly turn into a financial nightmare.
Comparing Pricing Models for Different Spaces
How you pay for your workshop will vary wildly depending on where you land. Shared spaces and makerspaces offer flexibility, which is great for getting started, while private units operate on more traditional commercial lease terms.
You'll find that hourly or daily rentals at makerspaces often run from $40-$100 per hour or about $120 for a full day. For those spending more time in the shop, monthly memberships are a much better deal, typically ranging from $115-$425 per month. This gets you access to professional-grade tools without the massive upfront investment. For a deeper dive into these kinds of flexible rental rates, check out a resource like MicroFlexSpace.com.
Private commercial units, on the other hand, are priced per square foot, per year. For instance, a 1,000-square-foot shop at $15 per square foot comes out to $15,000 a year, or $1,250 a month. This gives you predictable costs but locks you into a longer financial commitment. For artists thinking about long-term arrangements, our guide to artist residencies in Chicago offers another angle on securing dedicated creative space.
Building a Sample Workshop Budget
Let's make this real. Here are two sample monthly budgets to show how the numbers can stack up depending on your situation.
Sample Budget: Hobbyist in a Shared Workshop
| Cost Item | Estimated Monthly Cost | Notes |
|---|---|---|
| Membership Fee | $250 | Mid-tier plan with 40 hours access |
| Material Storage | $50 | For a lockable project cabinet |
| Consumables | $75 | Sandpaper, glue, finishes, etc. |
| Total Monthly Cost | $375 |
Sample Budget: Professional in a Private Unit
| Cost Item | Estimated Monthly Cost | Notes |
|---|---|---|
| Base Rent (1,000 sq ft) | $1,250 | Based on $15/sq ft annually |
| Utilities (Electric/Gas) | $300 | Will fluctuate with machine use |
| Liability Insurance | $100 | A must-have for any business |
| CAM Fees | $85 | Covers general building upkeep |
| Total Monthly Cost | $1,735 |
The jump from a shared space to a private unit is substantial. The professional’s total monthly cost is more than four times that of the hobbyist, highlighting the importance of having a solid business plan and client base before taking on a private commercial lease.
By breaking down every potential expense, you can build a budget that actually works. This prep work is the single most important thing you can do to ensure your new shop is a creative asset, not a source of financial stress.
Navigating Leases, Zoning, and Legal Hurdles
Finding the right spot is one thing; locking it down legally is another beast entirely. The paperwork—whether it's a makerspace membership or a full-blown commercial lease—is where your rights and responsibilities get cemented. This isn't just red tape; it's your protection.
I've seen too many woodworkers get burned by overlooking a single clause in a dense document. Don't let the legal jargon intimidate you. Taking the time to understand what you're signing is the best defense against future headaches and unexpected liabilities.
Deconstructing the Rental Agreement
Before your pen ever touches paper, you need to dissect the agreement. A standard residential lease won't cut it for a workshop. You're looking for language that specifically accounts for the realities of making things out of wood. If the agreement feels vague, that's a serious red flag.
First, zero in on the lease duration and renewal options. A shorter lease might give you flexibility if you're just starting out, but a longer term provides stability and locks in your rent. Make sure the renewal process is crystal clear so you aren't left scrambling for a new space when your term expires.
Then, you need to dig into the clauses that cover your day-to-day operations.
- Noise and Dust Control: Woodworking is loud and messy. The agreement needs to spell out the rules. Are there quiet hours? What are the specific requirements for dust collection? You need to know this upfront.
- Material and Chemical Storage: Look for any restrictions on storing lumber, finishes, solvents, or other chemicals. This is a big one for both safety compliance and simply being able to do your work.
- Alterations and Improvements: Can you make the space your own? The lease must define what’s allowed. You’ll likely need to install 220V outlets for larger machines, run dust collection ductwork, or build storage. Get permission in writing.
Getting these details sorted out from the beginning prevents you from accidentally violating your lease and facing eviction.
The Critical Importance of Zoning Laws
Zoning is probably the biggest legal hurdle you'll face, and it's a non-negotiable one. Municipal codes dictate exactly what kind of activities are allowed in different areas. Firing up a table saw in a building not zoned for it can lead to hefty fines and a shutdown order from the city.
You have to confirm the property's zoning classification yourself. You’re looking for designations like "light industrial," "commercial workshop," or something similar that explicitly permits fabrication or artisanal manufacturing. A property zoned only for retail or office use is almost always a no-go.
Finding this information is usually straightforward. Most city or county government websites have online zoning maps. If the map is confusing, just call the municipal planning or zoning department. They'll give you a definitive answer and save you from making a very expensive mistake. For those seeking more structured guidance, organizations like the Alliance for Artist Communities can offer valuable perspective on navigating these professional landscapes.
Never take a landlord’s word on zoning as final. It is your responsibility to perform due diligence. A landlord might be unaware of the specifics or, in rare cases, intentionally misleading. Always verify with the city yourself.
Liability Waivers vs. Comprehensive Leases
The legal agreement you sign will look very different depending on whether you join a shared makerspace or rent a private commercial unit.
Shared workshops almost always use membership agreements that include a liability waiver. This is standard procedure. By signing, you're acknowledging the risks involved and agreeing not to hold the facility responsible if you get hurt. But remember, this doesn't replace your own personal liability insurance—you still need it.
Renting a private space, on the other hand, means signing a comprehensive commercial lease. This is a far more complex legal document. It governs your entire relationship with the landlord, covering everything from rent and maintenance duties to insurance minimums and what happens if you default. While it gives you much more control over the space, it also puts a great deal more legal and financial weight on your shoulders. I always recommend having a lawyer review a commercial lease before you sign.
Evaluating Power, Ventilation, and Safety Infrastructure
Once you get past the lease terms and monthly rent, the real work begins. The physical bones of a potential workshop are what will make or break your experience. When you rent space for woodworking, you're not just getting square footage; you're buying into a system that needs to support your craft safely and effectively.
It's easy to be swayed by a space that looks perfect at first glance. But the hidden infrastructure—the electrical, ventilation, and safety systems—is what truly determines its viability. Trust me, a thorough inspection isn't something you can skip. This is your due diligence, and knowing what to look for will save you from a world of headaches, unexpected costs, and serious safety risks down the road.
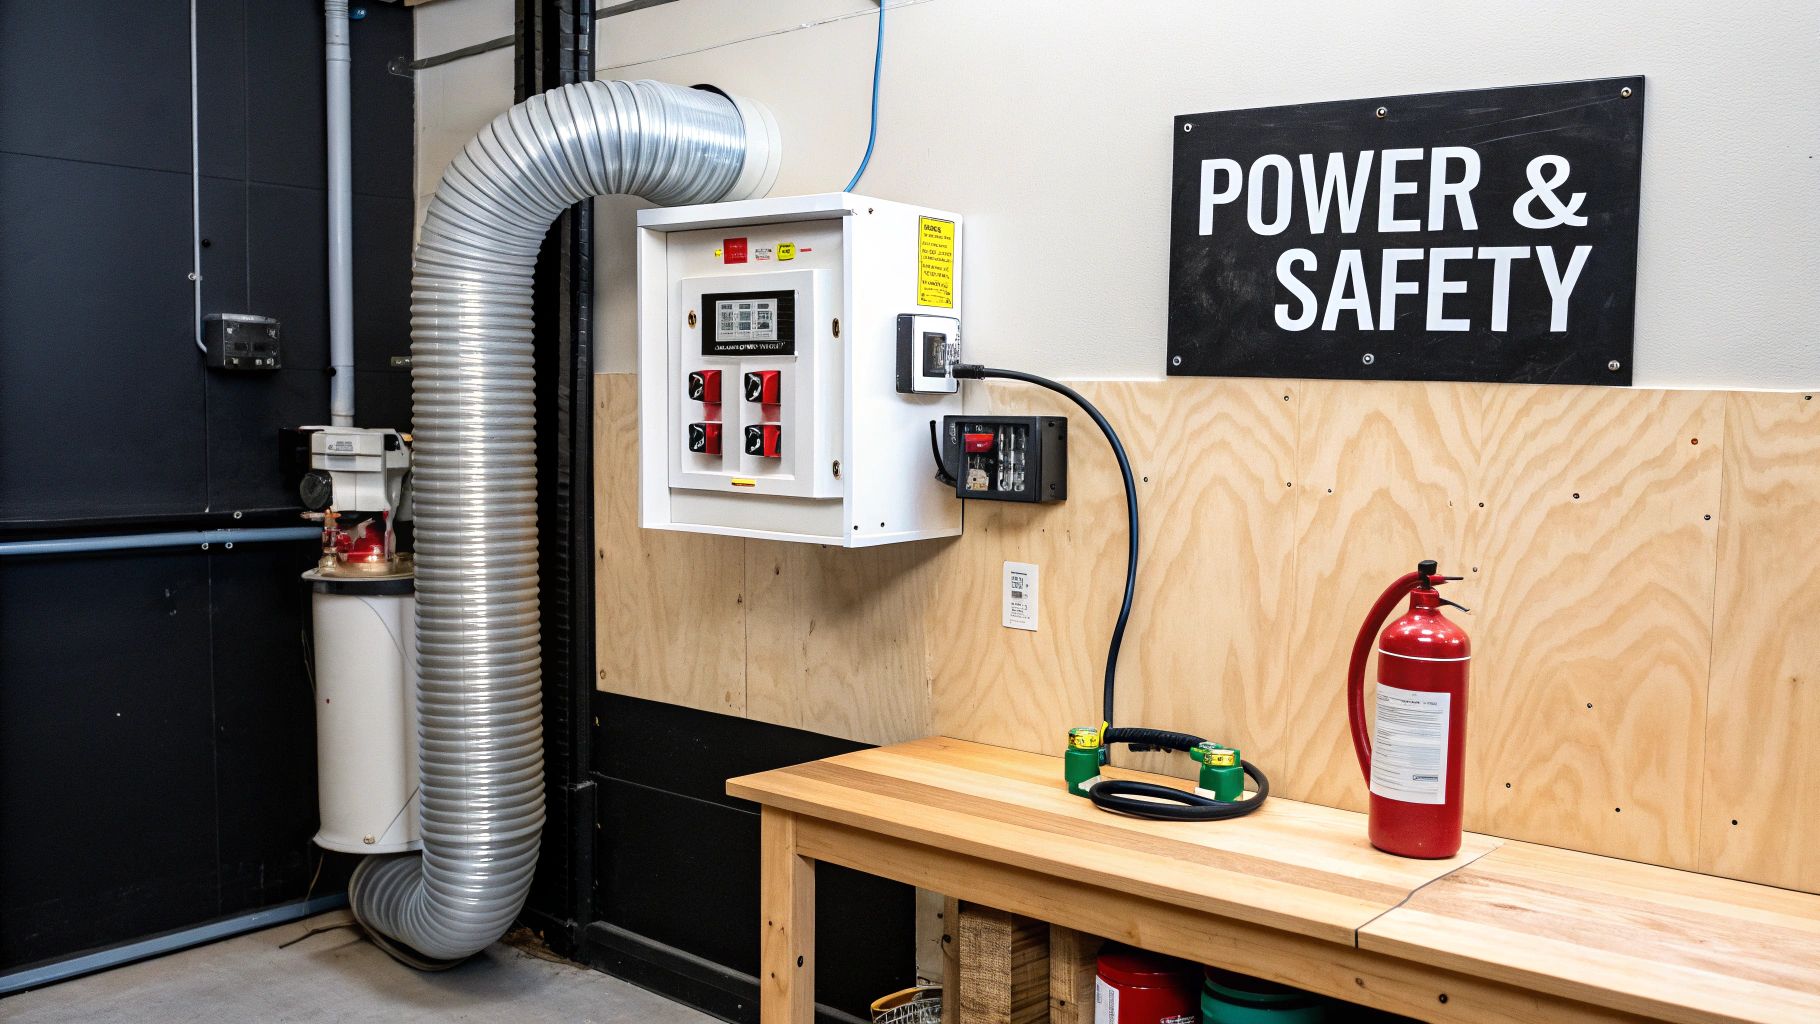
Assessing the Electrical System
Your tools are the heart of your craft, and they are power-hungry. A standard residential-grade electrical system just won't cut it. Honestly, if the power supply feels weak, it's a major red flag and probably a sign to walk away.
The first thing you should do is find the electrical panel. You need enough amperage to run multiple machines without constantly tripping breakers. A 100-amp service is the absolute bare minimum, but what you really want to see is a 200-amp panel. That's a much more realistic setup for a serious woodworker.
Next, get a feel for the outlet situation.
- 220V Outlets: Your big machines—cabinet saws, heavy-duty jointers, planers—need 220-volt power. Don't just check if they exist; look at where they are. Are they placed in logical spots that will work with an efficient shop layout?
- Circuit Distribution: Ask how many separate circuits are available. Having multiple 20-amp circuits is crucial. You don't want to turn on your table saw and dust collector only to have the whole system shut down. It's a common and incredibly frustrating problem in poorly planned shops.
If the electrical system isn't up to snuff, you can ask if upgrades are an option. But be warned, this is a major expense, and you'll absolutely need to get the landlord's permission in writing before touching anything.
A space with a weak electrical backbone will constantly fight against your workflow. Don't compromise on power; it’s the foundation of a functional shop.
The Non-Negotiable Need for Proper Ventilation
Let's be clear: wood dust is more than just a mess. It's a serious health hazard. Those fine particles hang in the air for hours and can lead to long-term respiratory problems. Because of this, a solid ventilation and dust collection strategy is completely non-negotiable.
As you walk through a potential space, look for existing infrastructure. Are there high-volume air filtration systems already in place? If not, does it look like you could easily install one? Check for good window placement that allows for cross-ventilation and see if there’s any ductwork you could adapt for a central dust collection system.
A dedicated finishing room is a huge plus. When you're applying finishes like lacquer or varnish, you're dealing with harmful volatile organic compounds (VOCs). Having a separate, well-ventilated area for this work is essential for keeping fumes out of your main workspace and protecting your health. If there isn't one, you'll need a solid plan for how to manage your finishing process safely.
The core principles of a healthy workspace are universal, whether it’s for woodworking or another craft. For instance, the safety concerns around fumes and airflow are also covered in our guide on how to start painting with acrylics, which touches on similar ventilation needs.
Verifying Essential Safety and Security Features
Finally, do a walk-through to assess the overall safety and security of the building and your unit. This is about protecting yourself, your tools, and your hard work.
Here’s a quick checklist of the essentials:
- Fire Safety: Find the fire extinguishers and check their inspection tags to make sure they're current. Look for sprinkler systems and make sure all emergency exits are clearly marked and unobstructed.
- First Aid: An accessible, well-stocked first aid station is a must. If the building doesn't provide one, setting one up yourself should be the first thing you do when you move in.
- Building Security: How secure is the building itself? Are the main doors locked? Is the parking lot or surrounding area well-lit at night? It's worth asking if there have been any break-ins in the complex.
- Unit Security: Take a close look at the locks on your unit’s doors and windows. You're about to store thousands of dollars in equipment and materials in there—strong security isn't a luxury, it's a necessity.
Choosing to rent space for woodworking is a big commitment. By carefully evaluating the power, ventilation, and safety of any location, you’re setting yourself up for a workshop that’s a place of creativity and production, not one of constant frustration and risk.
Bringing Your Workshop to Life: Layout and Move-In
You’ve signed the lease, the keys are in your hand, and now you’re standing in an empty space. This is the moment your vision for a dedicated workshop finally starts taking shape. But transforming this blank canvas into a safe, functional, and efficient workspace requires a smart plan.
How you navigate this transition from empty shell to operational shop will directly influence your productivity and enjoyment for years to come. Think of your shop layout as a roadmap for your entire woodworking process, designed to guide lumber from raw stock to finished piece with as few wasted steps as possible.
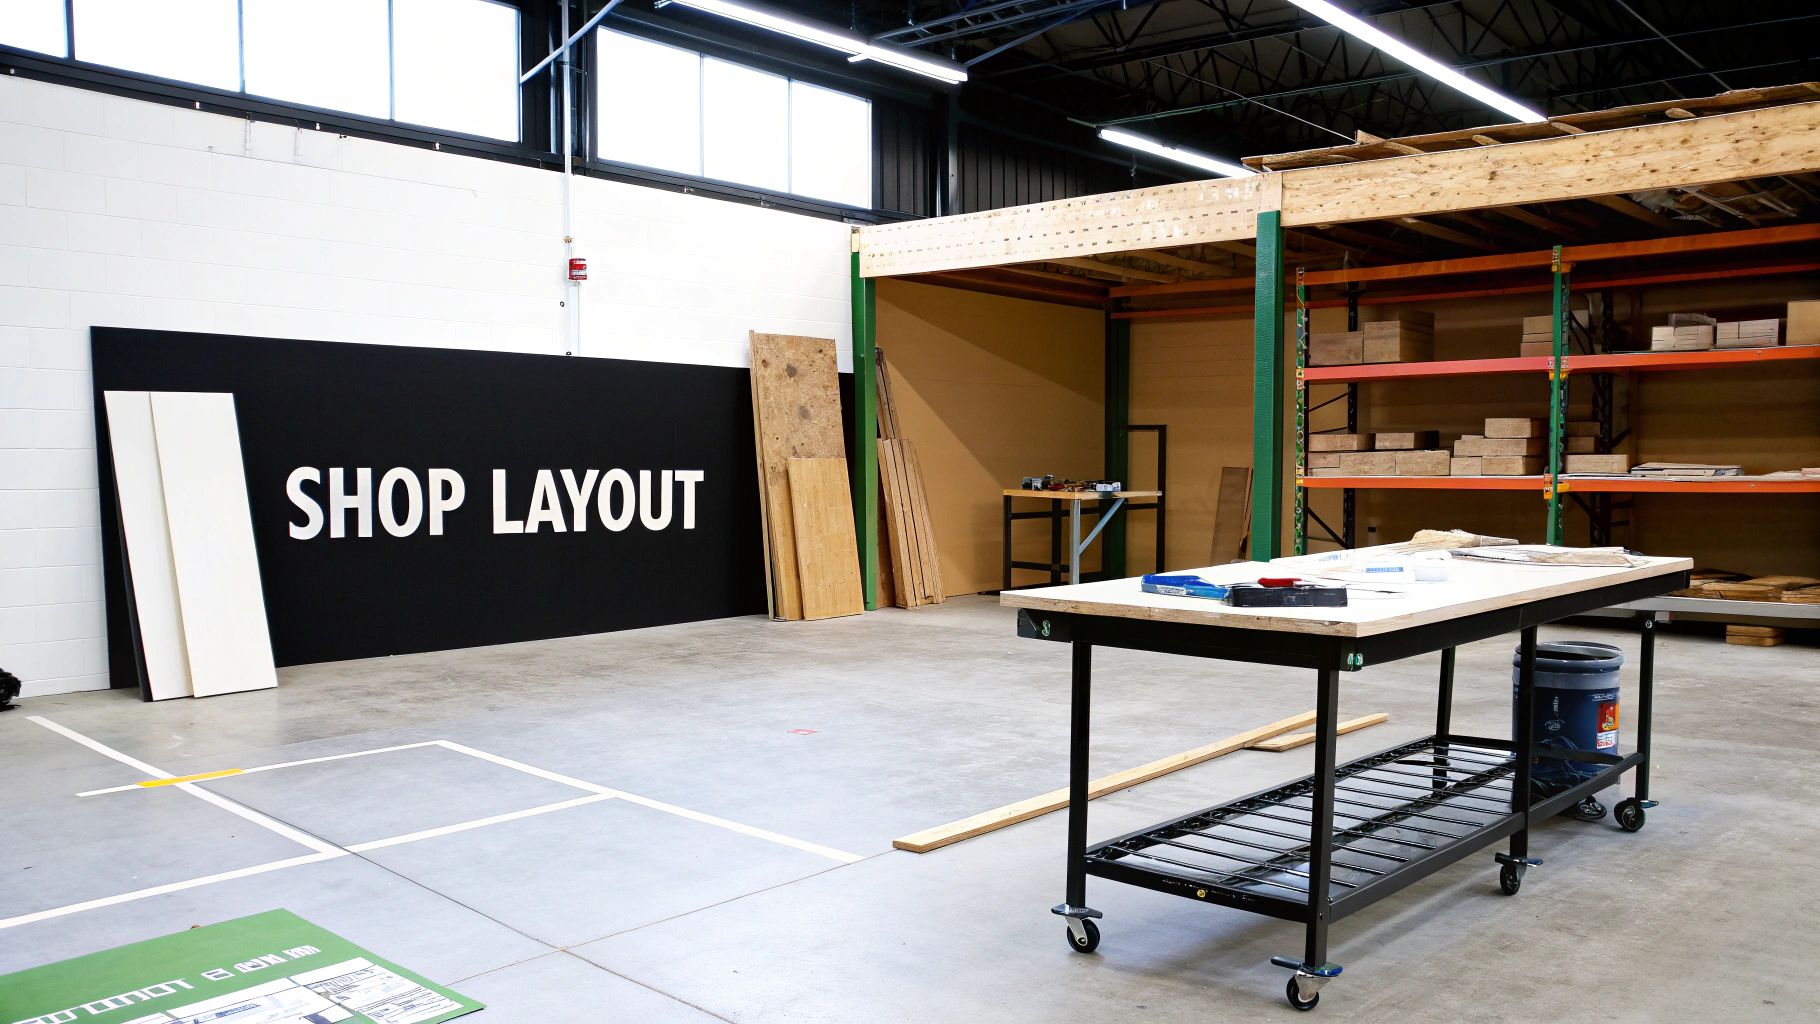
Designing an Efficient Workshop Layout
A well-designed shop is all about workflow. The ultimate goal is to minimize how much you have to move yourself and your materials, which not only saves a surprising amount of time but also drastically reduces the risk of accidents. Before you even think about moving in your first tool, grab a pencil and paper (or your favorite design software) and sketch a floor plan.
The best way to start is by creating distinct zones for each major stage of a project:
- Material Storage: Position this area near an entrance for easy unloading. It needs to handle sheet goods, long boards, and valuable offcuts without creating a maze.
- Milling & Rough Cutting: This is the home of your loudest, dustiest machines—the table saw, jointer, and planer. Keeping them clustered together makes dust collection far simpler and helps contain the mess.
- Assembly Area: The heart of this zone is a large, flat assembly table. Make sure you leave plenty of clearance on all sides for maneuvering clamps and large projects.
- Finishing Room: If you have the space, a separate, well-ventilated room for applying finishes is ideal. It keeps airborne dust off your wet finishes and isolates fumes from the main shop.
This kind of strategic zoning is absolutely critical when you rent space for woodworking, because it helps you get the most out of every single square foot. A good flow means you spend more time building and less time just shuffling things around.
From Blueprint to Reality: Workflow and Safety
With your zones mapped out, it's time to place your machines. The trick here is to arrange them in the order you typically use them. For instance, lumber often moves from the storage rack to the miter saw, then to the jointer, planer, and table saw. Arranging your equipment in this sequence creates a natural production line.
A common mistake is to shove all the big tools against the walls to create a large open area in the middle. While it feels spacious, it can cripple your workflow the moment you need to handle an 8-foot board or a full sheet of plywood. Always prioritize clearance for operations over empty floor space.
Safety has to be at the forefront during this stage. As a rule of thumb, leave at least three feet of clearance around each machine to give yourself room to work safely and to allow materials to pass through without getting hung up. Also, think about your dust collection ducting from the very beginning. Planning your layout around an efficient ducting route now will save you from a massive headache and a complete redesign later.
This planning is happening in a booming industry. The global woodwork market was valued at USD 780 billion in 2025 and is projected to hit USD 1,210 billion by 2033. With North America accounting for 30% of that market, the demand for quality rental spaces continues to grow. You can read the full research about woodwork market trends to get a better sense of the industry's scale.
The Essential Move-In Checklist
A smooth move-in minimizes downtime and gets you building sooner. Staying organized is the key to avoiding a chaotic and frustrating setup process.
A simple checklist can keep everything on track:
- Coordinate Machinery Delivery: Heavy tools need special handling. Schedule the delivery for a time when you have extra hands available and a clear path into the shop.
- Place Major Tools First: Following your layout plan, get your largest and heaviest machines into position before the space gets cluttered with smaller items.
- Install Dust Collection: This should be a top priority. Connect your main ductwork and drops to the milling machines right away to manage dust from day one.
- Organize Hand Tools & Hardware: Once the big stuff is in place, you can unpack and sort your smaller tools, fasteners, and accessories into their designated cabinets and drawers.
- Stock Your Consumables: Make a final run for essentials like sandpaper, glue, finishes, and safety gear. Having them stocked and ready means you won't have to stop mid-project for a supply run.
Common Questions About Renting a Woodworking Space
Finding the right space for your craft always kicks up a lot of questions. It's only natural. Getting clear answers to these common concerns upfront is the best way to avoid headaches later on and make sure you're signing on the dotted line with confidence.
Let's walk through some of the most frequent questions woodworkers have when they're on the hunt for the perfect shop. Knowing what to look out for is the difference between finding a productive haven and inheriting a whole new set of problems.
What Kind of Insurance Do I Need for a Rented Woodworking Shop?
This is non-negotiable. Getting the right insurance is the single most important thing you can do to protect your business and yourself. For almost any rental, you'll start with General Liability Insurance. Think of this as your foundational coverage; it handles costs if someone gets hurt in your space or if your work accidentally damages the property.
Your landlord will almost certainly require this and will ask to be named as an "additional insured" on your policy. It’s a standard practice that protects them from any liability stemming from your activities in the shop.
But that only covers others. To protect your own investment, you'll need Property Insurance. This is what covers your valuable tools, machinery, and lumber from disasters like fire, theft, or serious water damage.
Finally, if you sell what you make, Product Liability Insurance is a must-have. Should one of your finished pieces fail and cause injury or damage, this policy protects you from potentially devastating financial fallout. Always sit down with an insurance professional who understands small workshops to build a policy that truly fits your needs.
Can I Share a Private Rented Studio With Another Woodworker?
Absolutely, but you have to do it the right way. Sharing a private shop is a fantastic strategy for splitting costs, but it requires formal agreements all around—no handshake deals.
First, check the lease. Your ability to share the space hinges entirely on its terms. Most commercial landlords will allow a co-tenant or a formal sublease, but you must get their explicit, written permission.
Before you even talk to the landlord, you and your potential shop-mate need to draft your own formal agreement. This is critical. Your internal contract should spell out:
- Financials: A clear breakdown of who pays what for rent, utilities, and other shared costs.
- Insurance: A plan for how you will both be covered under the required insurance.
- An Exit Plan: What happens if one of you needs to leave? Detail how the lease will be managed and how any shared equipment will be divided.
Only when you have a solid internal agreement and the landlord's official green light is a shared studio a safe bet. As many artists find, building a small creative community can be incredibly rewarding, but it demands a solid foundation of clear expectations. For more on this, our guide on social media for artists has some great tips on networking and collaboration.
What Are the Biggest Red Flags When Touring a Potential Space?
When you walk through a potential shop, your eyes need to be trained to spot the deal-breakers—the issues that could kill your productivity or compromise your safety. A few red flags should have you walking away without a second thought.
The biggest one is an inadequate electrical system. If you don't see 220V outlets for your big machinery, or if the wiring looks ancient and the service panel is low-amperage, the building can't handle a real workshop. Upgrading an electrical service is a massive, expensive job you don't want to get stuck with.
Next, watch out for poor ventilation. A space with no functional windows, no way to install a dust collection system, or no airflow is a serious health hazard. Fine wood dust is no joke, and you can't compromise on air quality.
Another major warning sign is any evidence of water damage. Look for stains on ceiling tiles, peeling paint, or a musty smell. A persistent leak is a constant threat to your tools, your lumber, and your sanity.
Finally, trust your gut when talking to the landlord or property manager. If they're evasive about zoning, past utility costs, or insurance needs, it’s a bad sign. You're entering a business partnership with this person, and a lack of transparency from the start often points to bigger problems down the road.
At Skyler’s Art, we believe that the right environment is essential for creativity to flourish. Explore a collection of original, expressive paintings born from a dedicated artistic practice at https://skylers-art.org.