How to Hang Large Canvas Art Like a Professional

When you bring a large piece of canvas art into your home, the final step—hanging it—is where the magic really happens. It’s the moment that transforms a beautiful object into a true centerpiece.
But let’s be honest, the thought of putting that first hole in the wall can be daunting. We’ve all been there, worried about getting it crooked, damaging the wall, or worse, seeing a beloved piece of art come crashing down.
This guide is here to take the guesswork and anxiety out of the process. Think of it less as a chore and more as the final, rewarding act of curating your space. With a little planning and the right techniques, you can hang your art securely and with the precision of a gallery professional.
The Foundation of a Flawless Display
Before you even pick up a tool, getting a great result comes down to three core ideas. Mastering these will give you the confidence to hang any large canvas perfectly.
H3: Measurement and Placement Are Everything
This is about more than just finding the center of a wall. Proper placement considers how the art interacts with the room's architecture, furniture, and sightlines. The goal is to create visual balance. We'll get into the specifics, but remember that thoughtful placement is the first step, and understanding how to choose art for your home can give you a much better sense of how to make your canvas a true focal point.
H3: The Right Hardware Is Non-Negotiable
The safety of your art hangs, quite literally, on the hardware you choose. A heavy canvas on drywall needs a completely different solution than a piece going onto a solid brick or plaster wall. We'll cover all the options so you can make the right call for your specific situation.
H3: A Methodical Approach Prevents Mistakes
Following a clear, step-by-step process is the best way to avoid common errors. It ensures your art is hung safely, securely, and looks exactly how you envisioned it from the start.
By focusing on these fundamentals, you can ensure your large canvas becomes the stunning, perfectly positioned feature it deserves to be. Let's walk through the practical steps and insider tips to get it done right.
Gathering Your Tools and Preparing the Space
Before you even think about making the first mark on your wall, it’s crucial to get organized. A methodical approach is what separates a professional, damage-free installation from a frustrating afternoon of mistakes. A successful project always starts with having the right tools on hand and taking a good, hard look at both the artwork and the wall where it will live.
This initial prep work isn't just busywork; it's the foundation of the entire process. It transforms a potentially stressful task into a controlled, precise one, letting you focus on accuracy and safety from the get-go.
Your Essential Toolkit for a Flawless Installation
To hang large canvas art with real precision, you need more than just a hammer and a nail. Each item in your toolkit serves a distinct purpose, all working together to create a secure and perfectly level display.
Here’s what I always have ready:
- A Quality Tape Measure: This is non-negotiable. It’s your go-to for everything from wall dimensions to hardware placement.
- A Laser Level: For large pieces, a laser level is a game-changer. It throws a perfectly straight line across the wall, offering accuracy that a traditional bubble level just can't match over long spans.
- An Electronic Stud Finder: This little device is your best friend for locating wall studs—by far the most secure anchor points for anything heavy.
- A Pencil: Simple, but essential for making light, erasable marks for your hardware.
- A Drill and Assorted Bits: You'll need this for creating clean pilot holes for screws and wall anchors.
Having these tools laid out and ready to go minimizes interruptions and keeps you in the zone. Think of this as the bare minimum for achieving that polished, gallery-quality look.
A critical pro-tip before you drill: take a moment to evaluate the structural integrity of your canvas itself. I've seen far too many large, beautiful pieces come with flimsy, pre-installed sawtooth hangers that are simply not up to the job. Always, always consider upgrading to a more robust system like D-rings or a French cleat for peace of mind.
Assess the Artwork and the Environment
Just as important as the tools is a careful inspection of the art. Look closely at the wooden stretcher frame. Is it solid? Are there any signs of warping or weakness? A strong frame is the backbone of a secure installation. This is especially true for custom pieces. Understanding the basics of canvas construction, like those covered in this guide on how to start painting with acrylics, can give you a better eye for quality.
Next, turn your attention to the wall. Where you hang your art matters. Try to avoid spots that get direct, intense sunlight, as those UV rays will fade the colors over time. You should also steer clear of high-humidity areas like bathrooms or kitchens. The moisture can cause the canvas to sag and the frame to warp—or worse, lead to mildew.
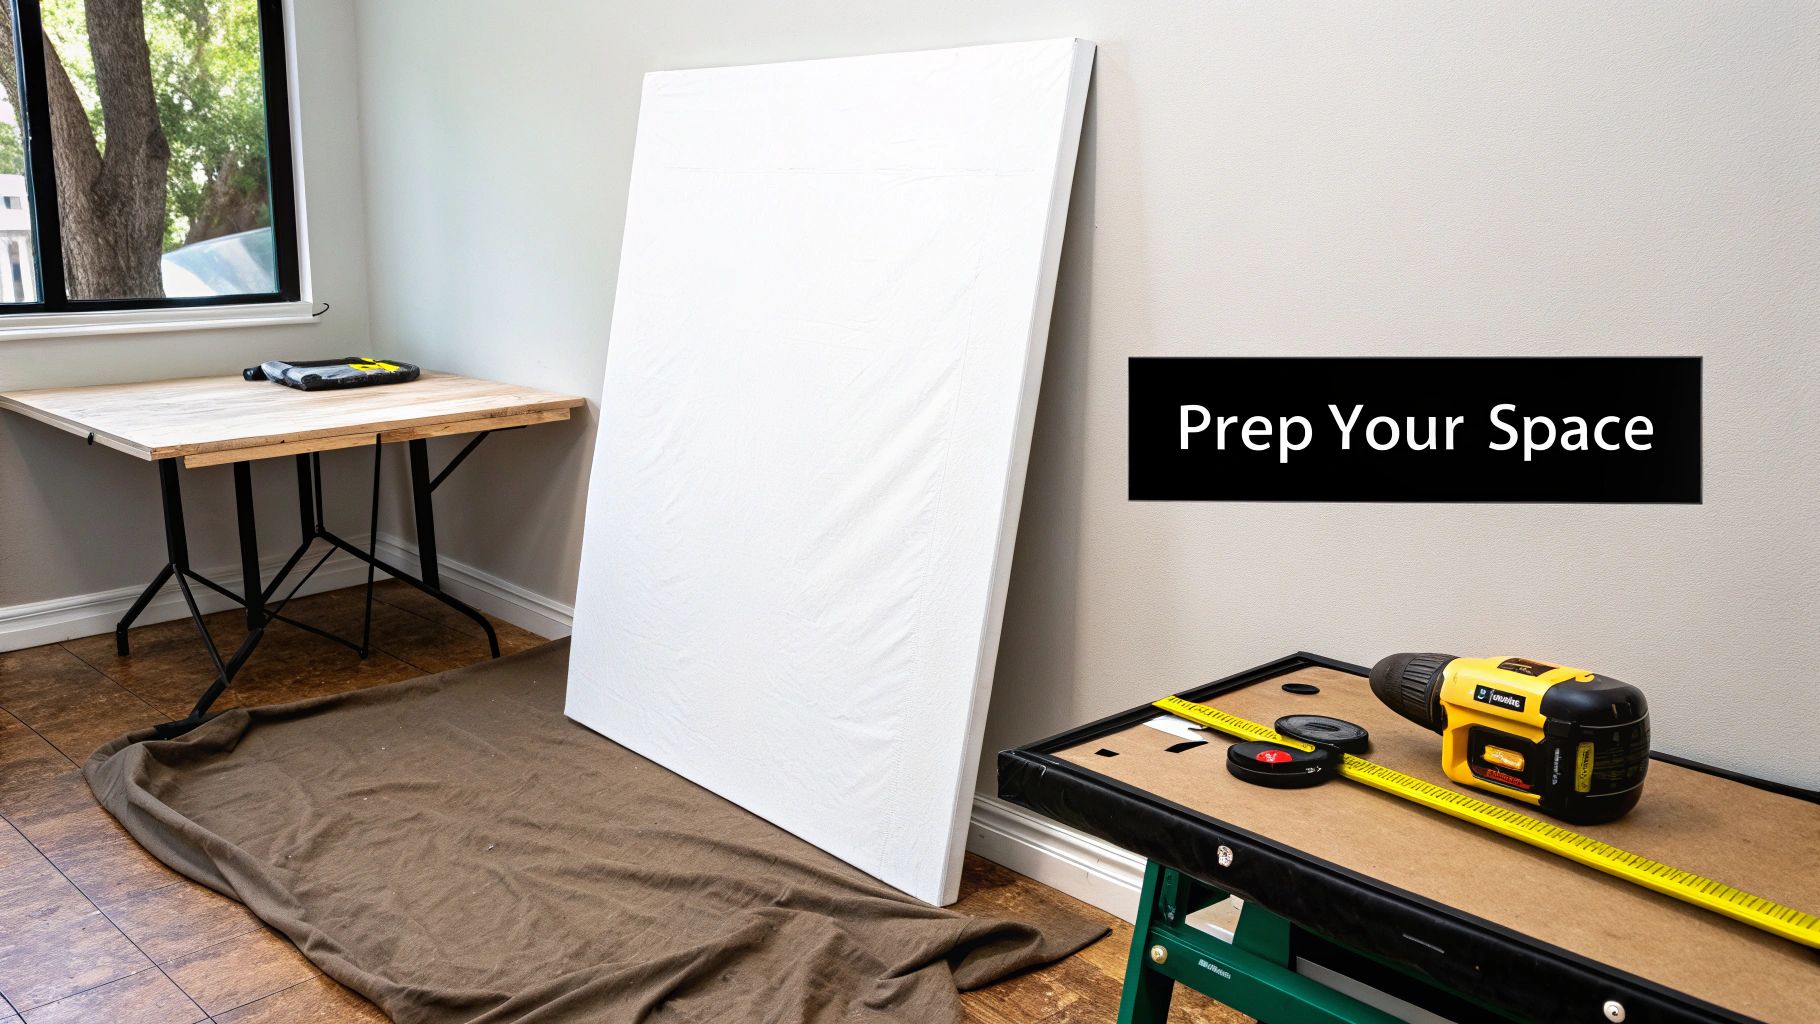
Finally, get your workspace ready. Lay down a drop cloth to protect your floors from dust and accidental scuffs. Move any furniture that might get in your way. A clear, open area is not only safer but also gives you the room you need to step back and view the art from a distance, which is essential for getting the placement just right.
Mastering Placement and Precision Measurement
Deciding where to hang your large canvas art is just as crucial as the hardware you choose to secure it. The right spot can create a sense of visual harmony, transforming a beautiful piece into a powerful design statement. But without careful measurement, even the most stunning artwork can end up looking awkward and disconnected from the room.
There’s a professional standard for a reason. Most galleries and interior designers hang art centered between 57 and 60 inches from the floor. This "museum height" puts the art right at the average person's eye level, which is the most comfortable and natural way to view it. It’s a small detail that makes a huge difference. In fact, some studies even suggest that homes following this guideline can see a perceived value increase of up to 25% simply because proper placement contributes to a more polished, intentionally designed interior. For more placement strategies, you can explore our curated wall art ideas.
Calculating Your Exact Hanging Point
Once you’ve chosen a general location, it’s time to get precise. A slightly crooked or off-center hang can diminish a piece's aesthetic appeal by a surprising 35%, so a few extra minutes spent with a tape measure is an investment that pays off.
Thankfully, a simple formula can prevent those frustrating mistakes.
-
First, measure the total height of your canvas and divide that number by two. This gives you the vertical center of the piece. For a 36-inch tall canvas, the center is at 18 inches.
-
Next, decide on your ideal center height on the wall. Let's stick with the 57-inch standard for this example.
-
Now, you need to find where the top of your canvas will sit. Simply add the 57-inch target to half the canvas height (18 inches). So, 57 + 18 = 75 inches from the floor.
-
But you don’t hang the art from its top edge. The final step is to measure the distance from the top of the canvas frame down to the hanging wire (pulled taut) or the D-rings. Let’s say this "drop" is 3 inches. Subtract that from your top edge height: 75 – 3 = 72 inches.
That final number—72 inches—is exactly where your hook needs to go.
The Visualization Trick
Before you grab a hammer, try this. Outline the canvas's dimensions on the wall using painter's tape. This simple step lets you live with the placement for a day or two. You can check the sightlines from your favorite chair, see how the light hits it, and make adjustments without putting a single hole in the wall.
Harmonizing Art with Furniture
When you're hanging art above a sofa, a console table, or a headboard, the rules change a bit. The goal here is to create a cohesive unit where the art and furniture feel intentionally connected, not like two separate elements that just happen to be near each other.
A guideline I always rely on is the two-thirds rule. Your canvas should be about two-thirds the width of the furniture it's hanging over. This sense of scale creates a beautiful balance, preventing the art from either overpowering the furniture or being dwarfed by it.
For the vertical spacing, aim for a gap of 6 to 8 inches between the top of the furniture and the bottom of the canvas. This proximity is key—it visually links the two pieces, making them look like a single, thoughtfully arranged vignette. Any more space, and the art starts to look like it's just floating aimlessly on the wall. Mastering these spacing principles is a huge part of learning how to hang large canvas art for maximum impact. You can discover more insights about hanging large artwork on PaintingsOnline.com.au.
Choosing the Right Hardware for Any Wall
The long-term security of your artwork hangs, quite literally, on choosing the right hardware for your wall. This isn't a step where you can afford to guess. Using the wrong anchor won't just damage the wall; it could lead to your cherished canvas crashing to the floor. Before you pick up a drill, you need to know what you're working with.
A quick tap on the wall is often all it takes. A hollow, resonant sound almost always means drywall, which is standard in most modern homes. If you hear a dull, solid thud, you're likely dealing with older plaster and lath. A hard, unforgiving surface that doesn't give at all? That’s brick or concrete. Each of these materials requires a completely different mounting strategy.
Matching Hardware to Wall Material
When you're dealing with drywall, the gold standard is to find a wall stud. Driving a screw directly into that solid wood provides an incredibly secure hold. You can easily find them with a basic stud finder. Of course, life is rarely that convenient, and studs are often not exactly where you envision your masterpiece.
When a stud isn't an option, you'll need to turn to wall anchors. Here are the go-to choices:
- Expanding Plastic Anchors: These are fine for lighter canvases on drywall. As you drive the screw in, the anchor expands behind the wall, creating a secure grip.
- Self-Drilling Anchors: A definite step up in strength, these threaded anchors often don't even need a pilot hole. They’re a reliable choice for medium-weight pieces.
- Toggle Bolts and Molly Bolts: For anything truly heavy on a hollow wall (like drywall or plaster), these are what the pros use. They have spring-loaded wings that pop open behind the wall, distributing the art's weight over a much wider area for rock-solid stability.
If you’re up against solid walls like brick, concrete, or masonry, a standard drill won't cut it. You'll need a hammer drill and specialized masonry screws or anchors designed to bite into dense material without causing it to crack or crumble.
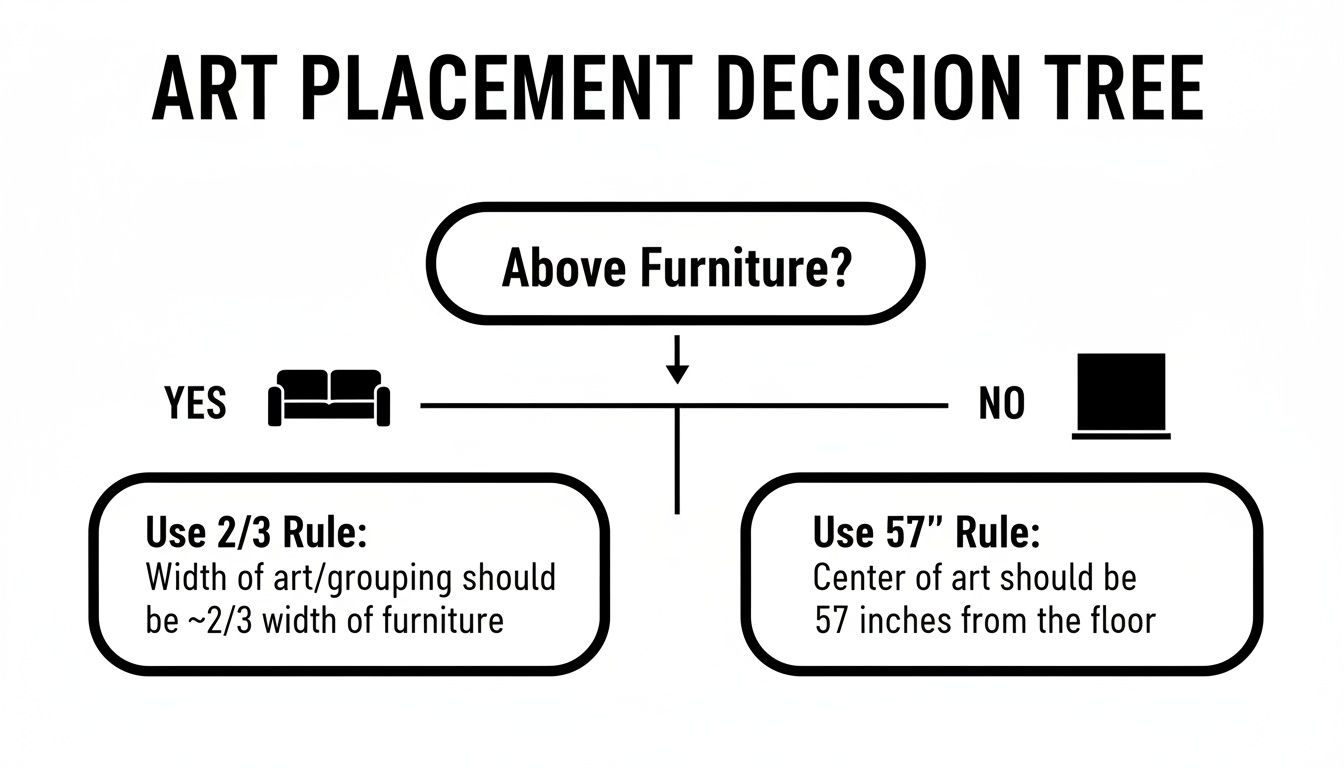
This decision tree shows how your initial placement choice—either over furniture or on a blank wall—can influence your hardware needs based on the visual balance and support required.
To make this easier, here is a quick reference guide to help you select the right hardware based on your wall type and the weight of your artwork.
Hardware Selection Guide by Wall Type and Art Weight
| Wall Type | Light Canvas (Under 10kg) | Medium Canvas (10-25kg) | Heavy Canvas (Over 25kg) |
|---|---|---|---|
| Drywall (No Stud) | Expanding Plastic Anchors | Self-Drilling Anchors | Toggle or Molly Bolts |
| Drywall (With Stud) | 2-inch Wood Screw | 3-inch Wood Screw | French Cleat or 3-inch Wood Screws |
| Plaster & Lath | Self-Drilling Anchors | Toggle or Molly Bolts | French Cleat or Toggle Bolts |
| Brick or Masonry | Masonry Screws & Anchors | Masonry Screws & Anchors | Heavy-Duty Masonry Anchors |
Remember, these are general guidelines. Always check the weight rating on the hardware packaging to ensure it can safely support your piece.
D-Rings Versus Picture Wire: A Critical Choice
It’s a common debate in the framing world: a single picture wire or two separate D-rings? For large, heavy canvases, the answer is definitive: always use two D-rings. A single wire creates a pivot point, allowing the art to shift and tilt with the slightest vibration. You'll find yourself constantly straightening it.
By installing two separate hooks on the wall that align perfectly with two D-rings on the frame, you create a stable, two-point hanging system. This locks the canvas in place, ensuring it stays perfectly level, permanently.
Understanding Weight Distribution and Safety
The weight of your canvas is the single most important factor in your hardware decision. It's a sobering statistic, but 62% of installation failures are due to a mismatch between the hardware and the wall type. A standard drywall anchor might top out at 20kg, while a proper masonry anchor can handle over 50kg.
For a substantial piece with a heavy frame, using two D-rings instead of a wire is non-negotiable. Research shows that wires are known to slip or fail in 45% of heavy installs. By splitting the weight across two anchor points, you essentially double your safety margin and prevent the vast majority of accidents. For a deeper dive into professional techniques for very heavy pieces, this comprehensive gallery guide is an excellent resource.
Elevating Your Space With Styling and Lighting
Your canvas is securely on the wall, but the work isn't quite finished. Now comes the part where art transforms a room—styling and lighting. These final touches are what make a piece feel truly integrated, turning a simple decoration into a powerful design statement.
Think of your large canvas as the anchor of the room's aesthetic. The colors within the art can guide your choices for smaller decor, like accent pillows or a well-placed throw blanket. By pulling these hues into the surrounding space, you create a cohesive visual narrative that feels intentional and professionally curated. For a deeper dive into how colors shape a room's atmosphere, it's worth exploring the principles of color psychology in interior design.
Creating Proportional Balance
In interior design, scale is everything. A large canvas needs to feel like it belongs, perfectly proportioned to the wall and the furniture around it. If it's too big, it can feel aggressive; too small, and it gets lost.
Here's a guideline I always rely on: aim for the artwork's width to be about two-thirds to three-quarters the width of the furniture it hangs above. This simple rule works beautifully over a sofa or a sideboard, creating a sense of harmony.
High ceilings—anything over 10 feet—are a fantastic opportunity to go even bigger. A substantial piece of art can ground a tall, airy space, making it feel more cohesive and inviting. And if you're creating a gallery wall, a consistent spacing of 2 to 3 inches between each piece will ensure the collection looks unified, not chaotic.
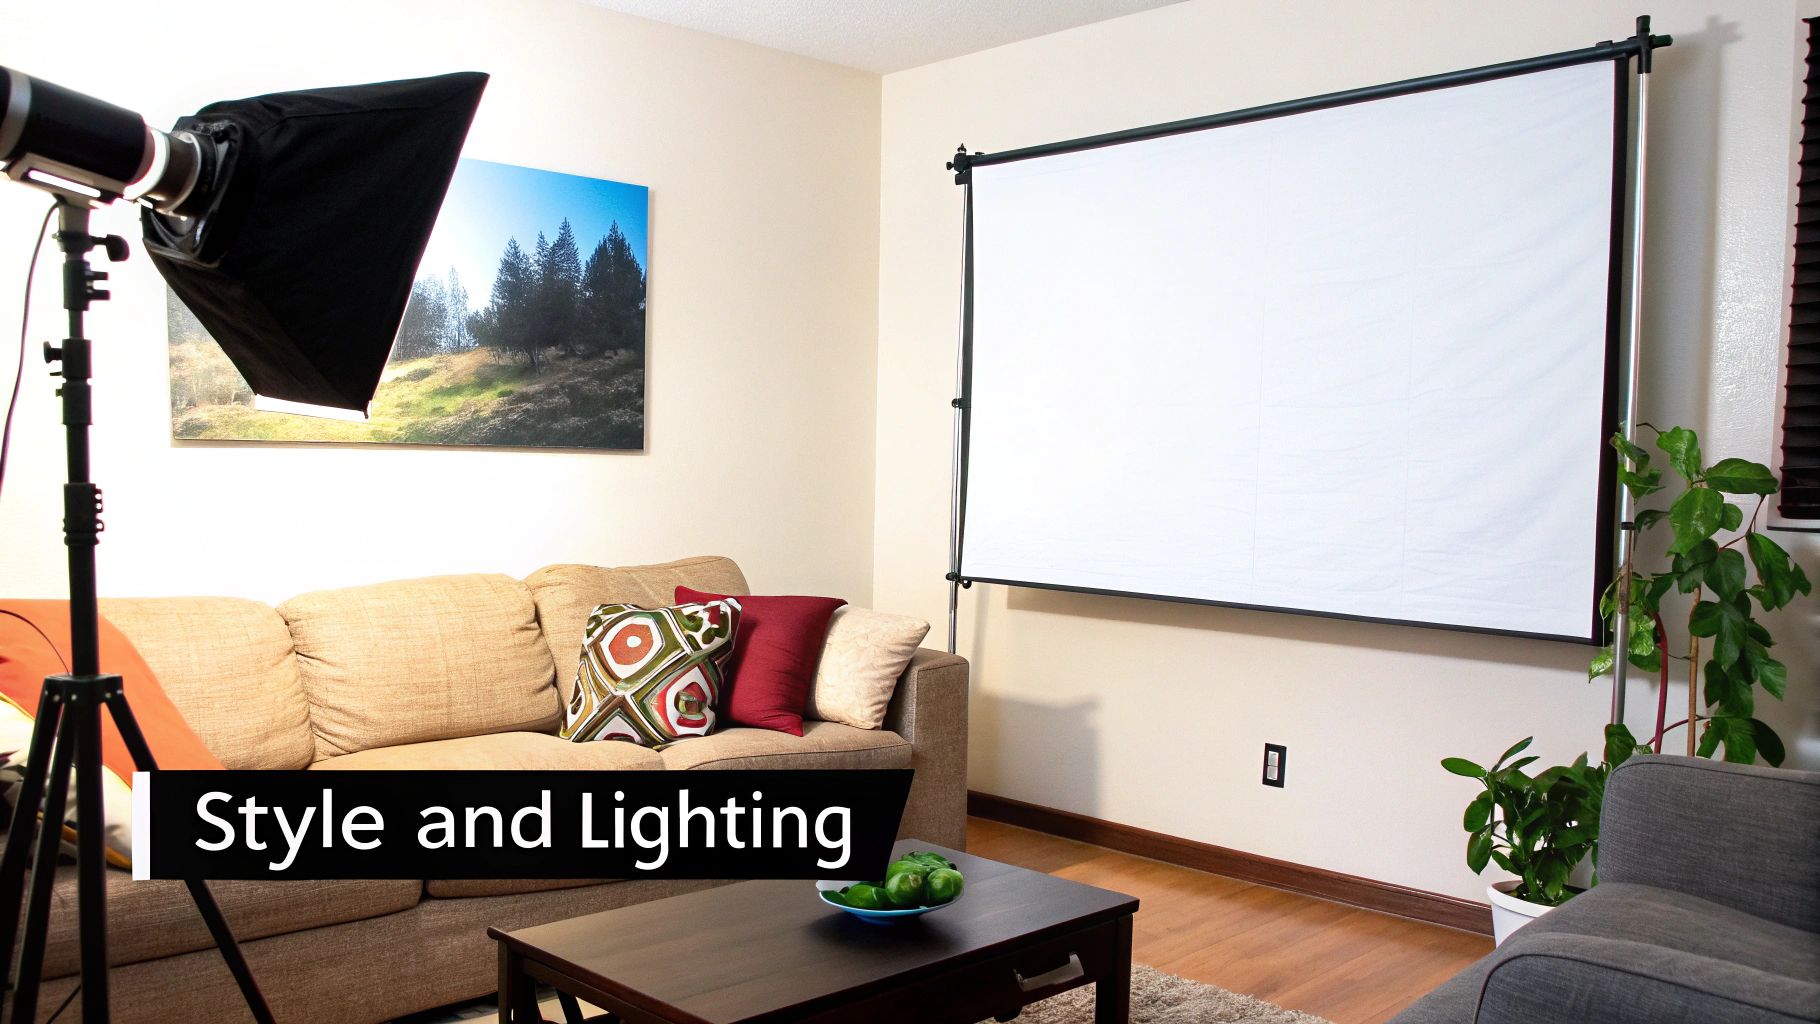
The Art of Illumination
Lighting is perhaps the single most impactful element in showcasing artwork. The right light makes colors pop and textures come alive. The wrong light can make even a masterpiece look dull and flat.
The source and angle of illumination are critical. A couple of professional-grade options can make all the difference:
- Track Lighting: Incredibly versatile, track lighting lets you direct multiple adjustable heads right where you need them. It's perfect for casting even, focused light from the ceiling.
- Picture Lights: For a more classic, intimate feel, a picture light mounted directly above the frame makes a single canvas a true focal point.
Here's a pro tip from the gallery world:
To eliminate glare and harsh shadows, always follow the 30-degree rule. Position your light source so the beam hits the center of the artwork at a 30-degree angle. This technique is favored by 68% of collectors for good reason—it can enhance color vibrancy by as much as 50%.
When you master the interplay of scale, color, and light, your canvas becomes more than just something on the wall. It becomes an essential, dynamic part of your home's design.
Common Questions About Hanging Large Art
Even with a detailed guide, every installation has its quirks. When you're dealing with a significant piece of art, unexpected challenges can feel daunting. Let's walk through some of the most common questions and frustrations I hear from collectors and designers. Having these answers in your back pocket can make all the difference between a smooth installation and a costly mistake.
These issues usually come down to specific wall types or troubleshooting those little annoyances that can throw a whole project off.
How Can I Hang a Heavy Canvas Without Studs?
It’s a common scenario: the perfect spot for your art is right between the studs. Not a problem. For this, high-capacity drywall anchors are your best friend.
- For canvases up to 25kg: A set of heavy-duty, self-drilling anchors will usually provide a perfectly secure hold. They bite into the drywall, creating a reliable anchor point.
- For anything heavier: You'll want to step up to toggle bolts. These are a professional's go-to for a reason. Their spring-loaded "wings" pop open behind the drywall, distributing the weight over a much larger surface area. This dramatically increases their holding power.
A key rule of thumb here is to always use two separate anchor points. This splits the load and keeps the artwork from shifting. A French cleat system is another fantastic option, especially for very heavy or wide pieces, as you can secure it to the wall with multiple toggle bolts for an incredibly stable mount.
What Is the Best Way to Hang Art on Plaster or Brick Walls?
Hanging on dense, unforgiving surfaces like plaster or brick requires a bit more finesse and the right hardware. Trying to force a screw or nail will only lead to damage.
For older, brittle plaster, you absolutely must drill a pilot hole first using a masonry bit. This simple step prevents the plaster from cracking and crumbling. Once your hole is drilled, insert a plastic wall plug, which will expand to grip the wall as you drive in the screw.
When it comes to solid brick or concrete, a hammer drill is non-negotiable. Use a proper masonry bit to create a clean hole, then install a heavy-duty masonry anchor. A good safety margin is crucial here—always choose hardware rated for a weight well above that of your artwork.
A critical mistake to avoid is hammering a nail directly into plaster. The force will almost certainly cause the surrounding plaster to fracture and crumble, creating a weak point that cannot safely support any significant weight.
Can I Use Adhesive Strips for a Large Canvas?
In a word: no. Please don't rely on adhesive strips for any significant piece of art. While they're great for small, lightweight photo frames, they simply aren't engineered to handle the weight, depth, and leverage of a large canvas over the long term.
Changes in humidity, temperature swings, and even the texture of your paint can cause the adhesive to fail without warning. The risk of your artwork crashing to the floor is just too high. For any piece weighing more than a few kilograms, you must use mechanical fasteners—screws and anchors—that are physically secured into the wall.
How Do I Keep My Large Canvas Perfectly Level?
The secret to a canvas that stays perfectly level forever is abandoning the single picture wire. A wire, by its nature, creates a pivot point. The slightest vibration from a closing door or the house settling over time will inevitably cause the art to shift and tilt.
The solution is a stable, two-point hanging system.
Install two D-rings on the back of the frame and two corresponding hooks on the wall. This creates a fixed mount that locks the canvas in place, preventing any tilting. Use a laser level to get your two wall hooks perfectly aligned horizontally before you hang the piece. This method is the surefire way to guarantee your masterpiece stays exactly where you want it.
If you run into a unique installation challenge or have questions about a specific piece, feel free to contact our art advisory team for personalized advice.
At Skyler's Art, every piece is created with heart and soul, ready to become the focal point of your space. Discover an original painting that speaks to you by exploring the gallery at https://skylers-art.org.